Our "baby" girl turned 3 recently, and I have to share a few photos from her special day! Her favorite books right now are the Care Bears books (the old school ones that were mine when I was little) so she wanted me to make her a Care Bear cake. Here it is!
It was interesting trying to transform the Wilton Care Bear cake pan (which was one of the new Care Bears) to Wish Bear from the old books. Little Sweets' favorite color is blue so I wanted to make a blue Care Bear... the other options were Grumpy Bear and Bedtime Bear, hence our choice to make Wish Bear!
And on to the cupcakes, which made because there were a lot of people coming to the party and we needed more cake. Here's a close-up shot of them, inspired by a Pinterest find!
The candy rainbows are Airheads Xtremes (rainbow berry sour candy). I found them in the Dollar Spot at Target--one package was enough for 24 cupcakes (cut them in half). If you're going to make these, wait until you're just about to serve them before adding the rainbows. I used homemade buttercream frosting and it worked well because the frosting hardened a bit and could hold them up better.
For the favors, I made some rainbow candy lollipops. I bought the candy mold from a local craft store and painted in the rainbows with those candy melts you get from craft stores.
Happy Birthday to our Little Sweets!
Showing posts with label Little Sweets. Show all posts
Saturday, January 28, 2012
Thursday, December 15, 2011
my Christmas present to myself (and my family and God)
I'm giving myself a blogging vacation for Christmas! I need to re-focus on what Christmas is all about and enjoy time with my family away from the computer.
I feel like God has really been working on my perspective lately in my alone time, in my conversations with my Sweets, and through a book called Crazy Love that our Sunday school class is reading right now. I want to share a little bit about that with you and how it affects this blog.
I used to try to make time to read the Bible and/or pray in the mornings, and now I find myself waking up and getting on the computer right away. I want to see what's happening in Blogland, check my Google Analytics stats and RSS subscription numbers, browse Pinterest, read through emails, etc. My priorities have obviously shifted and I don't think it's for the better.
When I stop to think about all the ways I could be spending my time, I want my choices to please God. I know that it is entirely possibly to blog for the glory of God, and I hope that some of the things I've done on this blog (like this or this) have made God happy.
I also want my choices to honor my family. We have made sacrifices for me to be a stay-at-home-mom. I want to prove that decision right and I humbly confess to you that I may do all the SAHM things (cook, craft, love), but I'm not good at just being with Little Sweets. As she gets older, I want her to remember that her mommy spent quality time with her and didn't "just a minute" her all the time.
I am also refocusing some of my time to be more intentional about teaching Little Sweets. I'm pre-preschool-homeschooling. Is that a thing? =) I've collected tons of ideas on my Preschool at Home board and I'm starting slowly. It's so exciting to see the tangible rewards of what I invest in her.
So I'm taking a step back from blogging.
I'm not going to delete or disown my blog... I'll probably be back to post things here and there. I'm definitely keeping up with my Etsy business for the reasons I mentioned here. But you won't be hearing from me as often on my blog.
If you want to find projects that have been popular on my blog thus far, please check out My Gallery!
Thank you to all my awesome readers and followers who have encouraged me, taught me and given me more confidence in my life!
Are you giving yourself anything for Christmas?
I feel like God has really been working on my perspective lately in my alone time, in my conversations with my Sweets, and through a book called Crazy Love that our Sunday school class is reading right now. I want to share a little bit about that with you and how it affects this blog.
I used to try to make time to read the Bible and/or pray in the mornings, and now I find myself waking up and getting on the computer right away. I want to see what's happening in Blogland, check my Google Analytics stats and RSS subscription numbers, browse Pinterest, read through emails, etc. My priorities have obviously shifted and I don't think it's for the better.
When I stop to think about all the ways I could be spending my time, I want my choices to please God. I know that it is entirely possibly to blog for the glory of God, and I hope that some of the things I've done on this blog (like this or this) have made God happy.
I also want my choices to honor my family. We have made sacrifices for me to be a stay-at-home-mom. I want to prove that decision right and I humbly confess to you that I may do all the SAHM things (cook, craft, love), but I'm not good at just being with Little Sweets. As she gets older, I want her to remember that her mommy spent quality time with her and didn't "just a minute" her all the time.
I am also refocusing some of my time to be more intentional about teaching Little Sweets. I'm pre-preschool-homeschooling. Is that a thing? =) I've collected tons of ideas on my Preschool at Home board and I'm starting slowly. It's so exciting to see the tangible rewards of what I invest in her.
So I'm taking a step back from blogging.
I'm not going to delete or disown my blog... I'll probably be back to post things here and there. I'm definitely keeping up with my Etsy business for the reasons I mentioned here. But you won't be hearing from me as often on my blog.
If you want to find projects that have been popular on my blog thus far, please check out My Gallery!
Thank you to all my awesome readers and followers who have encouraged me, taught me and given me more confidence in my life!
Are you giving yourself anything for Christmas?
Wednesday, November 30, 2011
Our cruise to the Bahamas: Celebrating 10 years of marriage!
We just got home from our first cruise! We celebrated our 10-year wedding anniversary, which fell on Thanksgiving this year.
We enjoyed a delicious bottle of wine on our anniversary which we had bought on our 5-year anniversary in Napa Valley, California and saved for this special occasion! (In case you're wondering, it was V. Sattui Cabernet Sauvignon from 2004.)
Little Sweets enjoyed her special window seat in our cabin. I freaked out right after I took this picture--I saw dolphins playing in the water while we were still in the port in Charleston, South Carolina! One of her favorite parts of each day was coming back to our cabin after dinner to discover what animal the housekeepers had made from towels. The monkey hanging from the ceiling was definitely a favorite!
Okay, now on to the photos you all want to see: the Bahamas! Our first port was Freeport on Grand Bahama Island. We went snorkeling and I didn't bring my camera so I don't have any photos from that day.
The water there was so beautiful. I could've eaten every meal of the cruise with this view.
I couldn't resist walking around the property and taking photos.
Our last day of the cruise ended with a beautiful display of God's creativity...
...a rainbow on one side of the ship:
...and a sunset on the other side:
God is good and He has blessed us so much in the past 10 years of marriage. It was so fun to be able to celebrate this milestone with our little family!
We enjoyed a delicious bottle of wine on our anniversary which we had bought on our 5-year anniversary in Napa Valley, California and saved for this special occasion! (In case you're wondering, it was V. Sattui Cabernet Sauvignon from 2004.)
Little Sweets enjoyed her special window seat in our cabin. I freaked out right after I took this picture--I saw dolphins playing in the water while we were still in the port in Charleston, South Carolina! One of her favorite parts of each day was coming back to our cabin after dinner to discover what animal the housekeepers had made from towels. The monkey hanging from the ceiling was definitely a favorite!
Okay, now on to the photos you all want to see: the Bahamas! Our first port was Freeport on Grand Bahama Island. We went snorkeling and I didn't bring my camera so I don't have any photos from that day.
In our second and last port, Nassau, we got an awesome tour of the island. We had lunch at Compass Point and it was definitely the most colorful place I've ever seen!
The water there was so beautiful. I could've eaten every meal of the cruise with this view.
I couldn't resist walking around the property and taking photos.
Our last day of the cruise ended with a beautiful display of God's creativity...
...a rainbow on one side of the ship:
...and a sunset on the other side:
God is good and He has blessed us so much in the past 10 years of marriage. It was so fun to be able to celebrate this milestone with our little family!
Monday, October 31, 2011
Monday, October 17, 2011
Saturday, October 15, 2011
A Perfect Saturday.
Today has been a perfect Saturday.
I slept in until 8 a.m., then made myself a delicious double-tall White Chocolate Mocha. It tasted like the cappuccinos that my Sweets and I enjoyed at the cafe near our hotel in Rome (after we added 4 sugars to it).
Then our little family enjoyed a brunch of waffles with fresh-cut strawberries, scrambled eggs and a Fall favorite of mine, Libby's Glazed Pumpkin Cookies!
I'm going to share the not-so-secret recipe for these Pumpkin Cookies later this week so stay tuned! Here's the recipe for Libby's Glazed Pumpkin Cookies.
After we stuffed ourselves, we settled into a couch full of blankets and pillows for Family Movie Morning. Little Sweets can't really sit through a whole movie, but it was so cozy and I got lots of cuddles from her and my Sweets.
Then nap time for Little Sweets and time to get ready for a date night tonight, courtesy of our MOPs chapter. Tonight I'm going to enjoy some quality time with my hubby!
I slept in until 8 a.m., then made myself a delicious double-tall White Chocolate Mocha. It tasted like the cappuccinos that my Sweets and I enjoyed at the cafe near our hotel in Rome (after we added 4 sugars to it).
Then our little family enjoyed a brunch of waffles with fresh-cut strawberries, scrambled eggs and a Fall favorite of mine, Libby's Glazed Pumpkin Cookies!
After we stuffed ourselves, we settled into a couch full of blankets and pillows for Family Movie Morning. Little Sweets can't really sit through a whole movie, but it was so cozy and I got lots of cuddles from her and my Sweets.
Then nap time for Little Sweets and time to get ready for a date night tonight, courtesy of our MOPs chapter. Tonight I'm going to enjoy some quality time with my hubby!
In other words... it's a Perfect Saturday.
Monday, October 10, 2011
Tuesday, September 13, 2011
Emotional Animals Game: Teach Kids about Emotions
Just in case you missed my guest post over at Craftionary last week...
I'm sharing with you a tutorial and game that you can play with kids ages 2 through 6. (Older kids would probably enjoy it, too, especially helping teach the younger ones.) Young children tend to relate well to animals. So why not use animals to help teach kids about emotions in a charades-style game?
I graduated with my Master's degree in School Psychology 2 weeks before Little Sweets was born and I became a stay-at-home-mom. Now that she is 2 years old, I've been enjoying finding ways to help her learn to recognize and deal with her emotions.
The Emotional Animals Game is played by rolling the "dice" and acting out whatever you roll. Let's let Little Sweets show you how it's done:
Easy as that!
All you really need for this game is a permanent marker and two square solid-colored blocks from a set like this:
I painted two of Little Sweets' unfinished wood square blocks with some craft store paint, but that is totally optional.
Now you're going to want to pick out some emotions to write on one of your dice. There are four basic emotions, from which most other emotions come: mad, sad, happy and scared. Then there are plenty of other options for you to pick from. Just think about which feelings or states you'd want to teach your child(ren) about.
Next, pick six animals that are relatively easy to mimic. We chose: cat, dog, monkey, cow, mouse and elephant. (Elephant is a little harder than the others...maybe a bird would've been easier?)
Now let's see your best "silly dog"!
Hmmm, what would a scared elephant look like?
This game can also be taken a step further, depending on your child's readiness to explore emotions deeper. For instance, when Little Sweets acts out a mad animal, we can talk about the best ways to handle anger. Put it in terms of how an animal might react because, again, young children tend to relate well to animals.
I hope you and your kids enjoy playing this game and learning about emotions together!
I'm sharing with you a tutorial and game that you can play with kids ages 2 through 6. (Older kids would probably enjoy it, too, especially helping teach the younger ones.) Young children tend to relate well to animals. So why not use animals to help teach kids about emotions in a charades-style game?
I graduated with my Master's degree in School Psychology 2 weeks before Little Sweets was born and I became a stay-at-home-mom. Now that she is 2 years old, I've been enjoying finding ways to help her learn to recognize and deal with her emotions.
The Emotional Animals Game is played by rolling the "dice" and acting out whatever you roll. Let's let Little Sweets show you how it's done:
Easy as that!
All you really need for this game is a permanent marker and two square solid-colored blocks from a set like this:
I painted two of Little Sweets' unfinished wood square blocks with some craft store paint, but that is totally optional.
Now you're going to want to pick out some emotions to write on one of your dice. There are four basic emotions, from which most other emotions come: mad, sad, happy and scared. Then there are plenty of other options for you to pick from. Just think about which feelings or states you'd want to teach your child(ren) about.
Next, pick six animals that are relatively easy to mimic. We chose: cat, dog, monkey, cow, mouse and elephant. (Elephant is a little harder than the others...maybe a bird would've been easier?)
Now let's see your best "silly dog"!
Hmmm, what would a scared elephant look like?
This game can also be taken a step further, depending on your child's readiness to explore emotions deeper. For instance, when Little Sweets acts out a mad animal, we can talk about the best ways to handle anger. Put it in terms of how an animal might react because, again, young children tend to relate well to animals.
I hope you and your kids enjoy playing this game and learning about emotions together!
Tuesday, September 6, 2011
Teach Kids about Emotions: Guest Post at Craftionary
Today I'm guest posting over at Craftionary with a super easy tutorial to help teach your kids about emotions!
Wait--before you head over to Craftionary, be sure to enter my giveaway to win MyMemories Digital Scrapbooking Software!
Saturday, September 3, 2011
Labor Day weekend
It's Labor Day weekend... time to get outside and have some fun!
This morning, we went to a little lake near our house. They have paddle boats, rope swings and slides into the lake, a swimming pool with a 2-story waterslide, a splash pad for the little ones and a lazy river.
Little Sweets surprised us by wanting to go down the big waterslide over and over again. She's usually very cautious but she loved the ride on our laps! I lounged a bit by the pool while my Sweets took Little Sweets in the pool. See them there by the yellow slide?
Since the lake and the pools were a bit retro (that's the nice way of putting it!), I decided to put some retro flair to our photos using the Instagram app. So fun and I think it's another thing I'm going to soon become obsessed with.
What are you doing this weekend?
This morning, we went to a little lake near our house. They have paddle boats, rope swings and slides into the lake, a swimming pool with a 2-story waterslide, a splash pad for the little ones and a lazy river.
Little Sweets surprised us by wanting to go down the big waterslide over and over again. She's usually very cautious but she loved the ride on our laps! I lounged a bit by the pool while my Sweets took Little Sweets in the pool. See them there by the yellow slide?
Since the lake and the pools were a bit retro (that's the nice way of putting it!), I decided to put some retro flair to our photos using the Instagram app. So fun and I think it's another thing I'm going to soon become obsessed with.
What are you doing this weekend?
Saturday, August 20, 2011
Washington, D.C. - Part 3
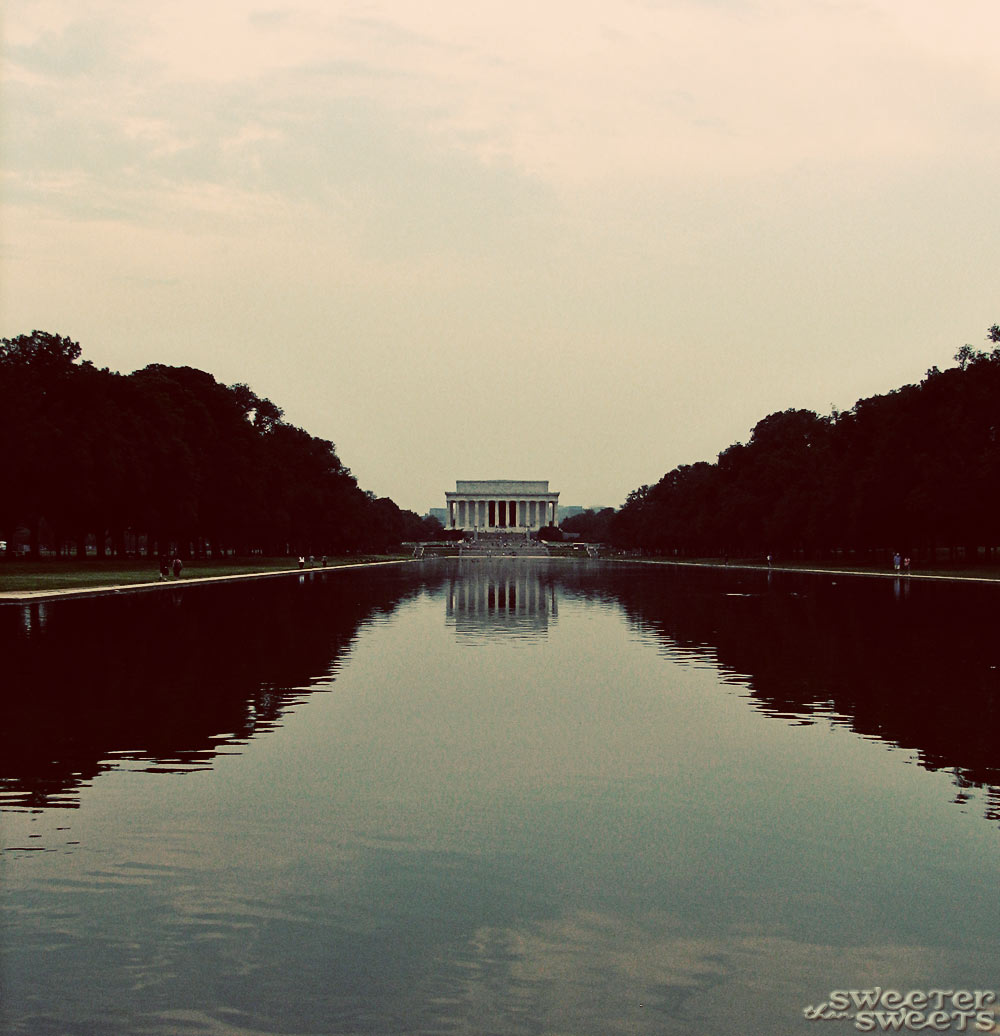
I can't get enough of Washington, D.C. I had never been there prior to just a few years ago, but it's one of those cities where you can discover more each time you go, so you want to go back time and time again. Here are a few more of our 1970s-style photos from the capital.
I love this last photo, which is a quote by Thomas Jefferson on the walls of the Jefferson Memorial. We watched a movie based on the book by Newt Gingrich, Rediscovering God in America, and I would highly recommend it for its "walking tour" of Washington, D.C. that focuses on the undeniable centrality of God in our nation's history.
If you missed it, Part 1 has more 1970s-style photos of Washington, D.C. and Part 2 is a collage of items from the National Museum of American History.
I love this last photo, which is a quote by Thomas Jefferson on the walls of the Jefferson Memorial. We watched a movie based on the book by Newt Gingrich, Rediscovering God in America, and I would highly recommend it for its "walking tour" of Washington, D.C. that focuses on the undeniable centrality of God in our nation's history.
If you missed it, Part 1 has more 1970s-style photos of Washington, D.C. and Part 2 is a collage of items from the National Museum of American History.
Wednesday, August 17, 2011
Washington, D.C. - Part 1
Despite it being back-to-school time for most of the U.S., I'm in a vacation mindset because I'm still playing laundry catch-up from our last getaway of the summer. We had an amazing week in Washington, D.C. and the only thing that could've made it better is if I'd found these awesome Food and Games To-Go ideas before we went!
Check out Part 2 - A photo collage of items from the National Museum of American History and Part 3 for more 1970s-style photos of D.C.
What do you think of the Seventies action? Would you rather see traditional travel photos next time?
{I gave my photos a retro vibe using the Photoshop action "Seventies" by the Pioneer Woman. I love her actions!}
Check out Part 2 - A photo collage of items from the National Museum of American History and Part 3 for more 1970s-style photos of D.C.
What do you think of the Seventies action? Would you rather see traditional travel photos next time?
Tuesday, August 9, 2011
Women's Tube Top to Toddler Tunic - Tutorial
Seven years ago, I bought a tube top from Wet Seal. I loved it and I wore it for a little while, but then it sat in my closet for years. A few weeks ago, I finally was ready to admit that I'm never going to wear it again. I decided to get more use out of it by turning it into a tunic for my daughter. Here's a tutorial so you can do it, too!
This tutorial is going to give you directions for a tube top like this (stretchy, knit fabric with no seams) along with ideas for adaptations:
You can adapt it to work for your old tube tops or your thrift store finds. Just make sure if you're sewing a knit fabric that you use a ballpoint needle in your sewing machine.
Here's a "before" shot of me wearing it 7 years ago:
First, put it on your little model and using clothespins, clip it to the right size. Don't worry about whether it's done neatly, you're just trying to figure out what the finished length and width should be.
You can also use a store-bought tunic in the correct size to see what the finished measurements should be.
Now lay it out flat to measure the length and width. Right down the numbers somewhere so you don't forget later, then unclip it. We're going to work on getting the width right first, then the length.
(Little Sweets wears 2T or 3T and the finished measurements for her were 16" long and 9" wide.)
Now calculate how many inches you need to cut out of it to get it to the right finished width. Since I wanted to it to measure 9" across when finished and it started out at 17", I cut out 7". I included a generous 1" buffer, just in case my measurements were off (better to cut out too little than too much!).
Like I said, my tube top was seamless, so I got to pick where I wanted the seam to be. I decided it would be in the middle of the back since that would be easier than doing two down the sides. So I cut out the extra 7" from the middle. I used pins to mark where I was going to cut (my tailor's chalk wouldn't write on this fabric or I would've just marked it that way). I hope the picture explains this better:
(If you already have two seams down the sides, you can cut those and the extra material out from the sides to get the right width--in this case it would've been 3.5" from each side.)
Here's another picture to explain this part. On the left you can see where I pinned to get rid of those extra 7". I decided to sew down those lines before cutting because I didn't want the ruching to unravel. On the right, you can see what it looked like after it was sewn:
Then cut out the extra fabric and save it so you can make straps later.
Now, fold it in half lengthwise with right sides together and raw edges aligned. Pin in place and sew to create the seam in the back.
Now it's the right width and we need to work on the length. My tube top had an empire waist so I cut it into two pieces right at the bottom of the ruching. (If your tube top doesn't have details like this empire waist and ruching, the easiest way to do this part would be to cut off some fabric from the bottom and do a simple hem--and you'd be done!)
I wanted the ruched part to be 5" long to get the correct finished length of 16", so I measured and marked with a pin where to cut and sew (remember your seam allowance.)
Now you can sew along the marked line.
Oops! I realized after I sewed it that I did it wrong. Time for the seam ripper (it gets a lot of use in my house).
What did I do wrong? I sewed it like I usually sew quilting fabric, making sure not to pull on it. But this fabric is stretchy and I needed to pull it while sewing to make sure that it would stay stretchy. Here's the right way... see how it's pulled taut? That will allow it to stretch after it's sewn.
(I added this extra step of sewing along the cut edge before I sewed the two parts together to make sure that the ruching didn't unravel. If you know how to sew and your fabric is just a regular cotton/knit, you can skip this extra step.)
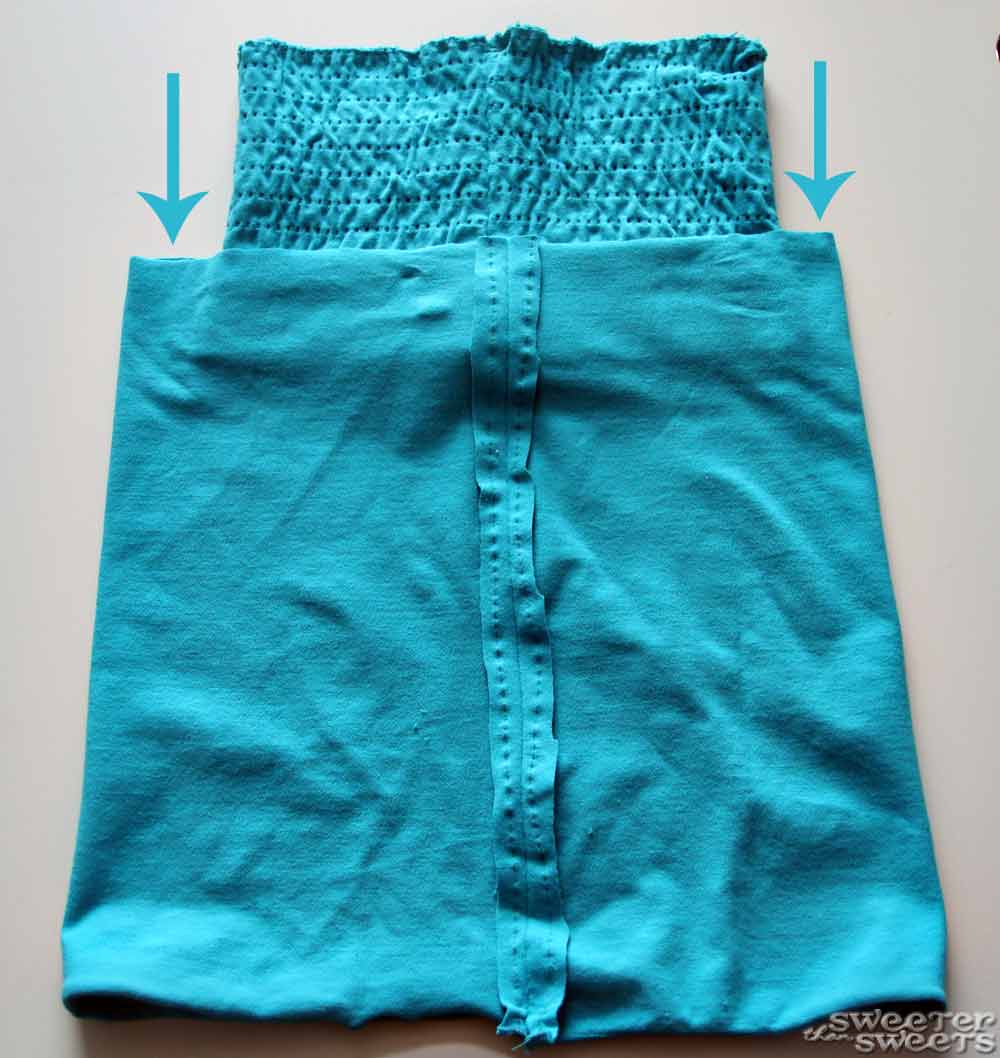
Okay now it's time to put the top and bottom together. This next photo shows how to start putting it together, with ride sides facing and the seams aligned:
Tuck the top part all the way into the bottom part and align the cut edges. Since the top is clearly narrower than the bottom, you'll need to do some more stretching as you sew. To do that, first pin where the seams are aligned (in the back) like you see in the next photo. Then pin on the other side (the front). Then stretch it evenly and add a pin on each side. This will show you how much you need to stretch as you sew.
Hope that makes sense. If not, keep your seam ripper handy! Nothing wrong with trial and error when you're sewing. =) When the two parts are sewn together it should look like this and it should be the right length and width:
Go back to the piece you cut out and cut some pieces long enough for straps. You may need to measure your model (or correctly-sized tunic) for this. I chose to gather the ends of each strap to add a little flair so I cut the straps much wider than they needed to be. See Step 2 of this tutorial to learn how to gather if you've never tried it before--it's very easy!
Put the tunic on your model and pin the straps where they should be... Little Sweets sits motionless when the TV is on so I knew that would be the perfect way to get this part done. Just be careful with the sharp pins, especially when you take it off! I liked the idea of cris-crossing the straps since I had long enough pieces of fabric left over.
Flip the tunic inside-out and carefully move the pins to the other side so you can see them as you sew. This photo shows it before I moved the pins to the other side:
Sew above the gathered seam (I sewed in the ditch where the ruching starts in order to hide the seam), then remove the gathering threads and trim the extra material. And here it is:
All done! Now your favorite tube top (or thrifted find!) can have a second life as a cute toddler tunic.
I love the cris-crossed straps in the back.
With the gathered straps, you can stretch them out to make the straps look more like cap-sleeves than tank top straps too! Looks like Little Sweets likes wearing Mommy's old tube top. I hope your little one likes it, too!
This tutorial is going to give you directions for a tube top like this (stretchy, knit fabric with no seams) along with ideas for adaptations:
You can adapt it to work for your old tube tops or your thrift store finds. Just make sure if you're sewing a knit fabric that you use a ballpoint needle in your sewing machine.
Here's a "before" shot of me wearing it 7 years ago:
First, put it on your little model and using clothespins, clip it to the right size. Don't worry about whether it's done neatly, you're just trying to figure out what the finished length and width should be.
You can also use a store-bought tunic in the correct size to see what the finished measurements should be.
Now lay it out flat to measure the length and width. Right down the numbers somewhere so you don't forget later, then unclip it. We're going to work on getting the width right first, then the length.
(Little Sweets wears 2T or 3T and the finished measurements for her were 16" long and 9" wide.)
Now calculate how many inches you need to cut out of it to get it to the right finished width. Since I wanted to it to measure 9" across when finished and it started out at 17", I cut out 7". I included a generous 1" buffer, just in case my measurements were off (better to cut out too little than too much!).
Like I said, my tube top was seamless, so I got to pick where I wanted the seam to be. I decided it would be in the middle of the back since that would be easier than doing two down the sides. So I cut out the extra 7" from the middle. I used pins to mark where I was going to cut (my tailor's chalk wouldn't write on this fabric or I would've just marked it that way). I hope the picture explains this better:
(If you already have two seams down the sides, you can cut those and the extra material out from the sides to get the right width--in this case it would've been 3.5" from each side.)
Here's another picture to explain this part. On the left you can see where I pinned to get rid of those extra 7". I decided to sew down those lines before cutting because I didn't want the ruching to unravel. On the right, you can see what it looked like after it was sewn:
Then cut out the extra fabric and save it so you can make straps later.
Now, fold it in half lengthwise with right sides together and raw edges aligned. Pin in place and sew to create the seam in the back.
Now it's the right width and we need to work on the length. My tube top had an empire waist so I cut it into two pieces right at the bottom of the ruching. (If your tube top doesn't have details like this empire waist and ruching, the easiest way to do this part would be to cut off some fabric from the bottom and do a simple hem--and you'd be done!)
I wanted the ruched part to be 5" long to get the correct finished length of 16", so I measured and marked with a pin where to cut and sew (remember your seam allowance.)
Now you can sew along the marked line.
Oops! I realized after I sewed it that I did it wrong. Time for the seam ripper (it gets a lot of use in my house).
What did I do wrong? I sewed it like I usually sew quilting fabric, making sure not to pull on it. But this fabric is stretchy and I needed to pull it while sewing to make sure that it would stay stretchy. Here's the right way... see how it's pulled taut? That will allow it to stretch after it's sewn.
(I added this extra step of sewing along the cut edge before I sewed the two parts together to make sure that the ruching didn't unravel. If you know how to sew and your fabric is just a regular cotton/knit, you can skip this extra step.)
Okay now it's time to put the top and bottom together. This next photo shows how to start putting it together, with ride sides facing and the seams aligned:
Tuck the top part all the way into the bottom part and align the cut edges. Since the top is clearly narrower than the bottom, you'll need to do some more stretching as you sew. To do that, first pin where the seams are aligned (in the back) like you see in the next photo. Then pin on the other side (the front). Then stretch it evenly and add a pin on each side. This will show you how much you need to stretch as you sew.
Hope that makes sense. If not, keep your seam ripper handy! Nothing wrong with trial and error when you're sewing. =) When the two parts are sewn together it should look like this and it should be the right length and width:
Go back to the piece you cut out and cut some pieces long enough for straps. You may need to measure your model (or correctly-sized tunic) for this. I chose to gather the ends of each strap to add a little flair so I cut the straps much wider than they needed to be. See Step 2 of this tutorial to learn how to gather if you've never tried it before--it's very easy!
Put the tunic on your model and pin the straps where they should be... Little Sweets sits motionless when the TV is on so I knew that would be the perfect way to get this part done. Just be careful with the sharp pins, especially when you take it off! I liked the idea of cris-crossing the straps since I had long enough pieces of fabric left over.
Flip the tunic inside-out and carefully move the pins to the other side so you can see them as you sew. This photo shows it before I moved the pins to the other side:
Sew above the gathered seam (I sewed in the ditch where the ruching starts in order to hide the seam), then remove the gathering threads and trim the extra material. And here it is:
All done! Now your favorite tube top (or thrifted find!) can have a second life as a cute toddler tunic.
I love the cris-crossed straps in the back.
With the gathered straps, you can stretch them out to make the straps look more like cap-sleeves than tank top straps too! Looks like Little Sweets likes wearing Mommy's old tube top. I hope your little one likes it, too!
Wednesday, August 3, 2011
Birthday at the Beach - Wrightsville Beach Part 2
The other day I shared a few of our photos from our weekend in Wilmington and Wrightsville Beach. Here are my favorites from the rest of our trip.
The morning of my birthday was spent at the beach. The water was warmer than it was a month ago and this time, Little Sweets declared (over and over again), "I do like the ocean!" I'm pretty sure that boogie boarding is the best way to spend a birthday morning. The last time we boogie boarded, I was 2 months pregnant with Little Sweets... oh how I've missed it! That's me out there waiting for a wave.
I just love the "East Coast-ness" of this next picture. I love the long boardwalks out to the sand and the tall grass on either side, and that you'll only find that on the East Coast.
Here's the view from the water towards the houses (with a little help from a few Photoshop Actions):
After afternoon naps and my walk around downtown Wilmington, we went out for my very special birthday dinner at The Melting Pot. We haven't been to a Melting Pot since 2003. It was time.
We got the best booth in the corner with this view of the wine racks. Or maybe it was the most secluded booth since we requested a booster seat when we made the reservation. Either way, it was awesome. And Little Sweets was on her best behavior.
We were so stuffed by the time the dessert course arrived, but of course we made room for it (we are Americans, after all).
Best birthday in a long time...probably because it was the first birthday I've spent with my husband in 3 years. It was so good celebrate with my two favorite people.
The morning of my birthday was spent at the beach. The water was warmer than it was a month ago and this time, Little Sweets declared (over and over again), "I do like the ocean!" I'm pretty sure that boogie boarding is the best way to spend a birthday morning. The last time we boogie boarded, I was 2 months pregnant with Little Sweets... oh how I've missed it! That's me out there waiting for a wave.
I just love the "East Coast-ness" of this next picture. I love the long boardwalks out to the sand and the tall grass on either side, and that you'll only find that on the East Coast.
Here's the view from the water towards the houses (with a little help from a few Photoshop Actions):
After afternoon naps and my walk around downtown Wilmington, we went out for my very special birthday dinner at The Melting Pot. We haven't been to a Melting Pot since 2003. It was time.
We got the best booth in the corner with this view of the wine racks. Or maybe it was the most secluded booth since we requested a booster seat when we made the reservation. Either way, it was awesome. And Little Sweets was on her best behavior.
We were so stuffed by the time the dessert course arrived, but of course we made room for it (we are Americans, after all).
Best birthday in a long time...probably because it was the first birthday I've spent with my husband in 3 years. It was so good celebrate with my two favorite people.
Subscribe to:
Posts (Atom)