Wait--before you head over to Craftionary, be sure to enter my giveaway to win MyMemories Digital Scrapbooking Software!
Showing posts with label featured on. Show all posts
Tuesday, September 6, 2011
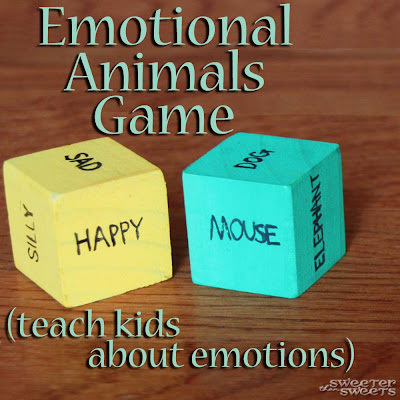
Teach Kids about Emotions: Guest Post at Craftionary
Today I'm guest posting over at Craftionary with a super easy tutorial to help teach your kids about emotions!
Friday, August 12, 2011
Obsess: To haunt or excessively preoccupy the mind.
| Prioritize Your Obsessions Print by The Decorium Studio |

What am I obsessed with, you ask?
Google Analytics: I know you think you're stalking me, but I'm stalking you, too. On Google Analytics, I can see where you live, what time of day you're on my blog, what pages you're looking at, and much more (insert evil laugh here). Check out how to set up and use Google Analytics here--my second blog post ever!
Pinterest: Who doesn't love great methods of organization? Learn more about Pinterest here, or find and follow me on Pinterest now. I also love seeing my blog or my Etsy shop Pinned. Want to see whether you've been Pinned? Change out my url for yours: http://pinterest.com/source/howsweeteritis.blogspot.com/
Features: Yes, I'm addicted to getting featured on all these amazing blogs. Want to get yourself featured (read: Free Advertising)? Read this post--updated last week with new sites!
Being inspired by others: Whenever I see a few objects that I love, I make an Inspiration Board or an Etsy treasury. It's so fun to find crafts, projects and items and to share them with others. Getting featured on Etsy's Front Page only fueled this obsession.
Those are the things I'm obsessed with lately. Now all I have to do is prioritize my obsessions, like the art print you see above...
What are you obsessed with?
(P.S. - Share your Pinterest page in the comments and I'll follow you!)
Saturday, August 6, 2011
Sprucing Up the Blog
I just finished some much-needed sprucing up of my blog. Did you notice?
Here's my favorite change: New social media buttons! What do you think?
I ordered the buttons from MoxieTonic on Etsy for $2. Yes, $2.00. She's just starting her shop so she's offering sets of 4 buttons for $1 each until she gets to 100 sales. Get over there soon if you want your own!
Back to my blog sprucing. I've rearranged a few things on my blog and hopefully it's easier to find things now. I widened the layout and merged the two sidebars into one.
I also wrote an "About Me" page for you to learn more about my blog and myself. I linked to some of my (and your!) favorite blog posts.
And finally, one other big update I've recently finished:
I'm always finding new amazing blogs that will feature crafty bloggers for free (!) advertising. I wrote this post back in April but I just updated it yesterday with a bunch of new blogs I've found. If you're a blogger, you'll want to read this post on how to get yourself featured on high-profile blogs. If you're a blog reader, check out the list and maybe you'll find some new blogs to bookmark!
In case you're wondering, I have yet to spend a dime on advertising... the blogs on this list have gotten me most of my new, amazing readers and followers--that's you! Did you find me from one of my features?
I hope you like the changes. I'd love to hear your feedback on the design (too wide for your screen? Too narrow?), the buttons (why am I not on Twitter yet?), and the About Me page (anything else that you'd like to know about me?)
Monday, June 27, 2011
Korker Cake Banner - Tutorial
In case you missed my guest post over at The CSI Project, here's my tutorial for a new kind of cake banner, a Korker Cake Banner... it's a fun and festive cake topper for any celebration, no cake decorating skills necessary!
The first thing we're going to do is curl the ribbon to look like korkers. Korker bows are those adorable hair bows with curly-cue ribbons:
Preheat your oven to 275 degrees Fahrenheit. Check to see if your dowels will fit in your oven. If not, cut the dowels to the right size.
Take one end of ribbon and wrap it around a dowel a couple of times. Then secure it to the end with a clothespin.
Start wrapping the ribbon somewhat loosely, then push it upwards to get as much ribbon on the dowel as possible without overlapping the ribbon.
Keeping wrapping and pushing together until you get to the end of the dowel, then use another clothespin to hold it on. Repeat with as many ribbons as you want.
To help the ribbon keep its korker shape, spray with some spray starch (optional). Then place the dowels on top of a cookie sheet and bake in your preheated oven for 25 minutes.
Take the cookie sheet out of oven and let ribbon cool on the dowels, then spray with more spray starch. When they are cool and dry, start unwrapping carefully so as not to tangle or otherwise mess up the cute korker shape of the ribbon. I twist it in the opposite direction to loosen and take it off the dowel little by little.
Now you want to pass a flame quickly over the ends of each korker to seal and prevent fraying. My ribbons turned out to be all different lengths since my dowels were different lengths but I like the look of it.
Lay all the ribbons out on a flat surface. Slide a piece of string or embroidery floss underneath one side, making sure to catch all the ends of your ribbons. Then tie a knot on one side. (I found it worked better to just tie one side of the ribbons, then start attaching it to the cake, then tie the other side.) Don't cut the string.
Now put your straws or chopsticks into the cake at whatever angle you want...just be sure they're in the cake deep enough to support the weight of the ribbons (trust me, you'll know when you start attaching the ribbons if they need to go deeper).
So that the string doesn't slide right down the straw, put a dollop of hot glue at the top of each straw. I let it dry and used the dollop just for the knot to rest on, but you could just glue the knot right on there to really secure it to the straw. Attach the first side of ribbons to one straw and try to keep the other end of the ribbons away from your yummy frosting.
Once the first side is on the cake, you'll be able to tell where the other knot will need to be. On my first attempt, I tied both knots ahead of time and ended up cutting one out and re-doing it once the first side was on the cake.
Now tie the other ends of ribbon with your string and attach it to the second straw. Trim (and heat seal) ribbons again if necessary. Ta-da!
This Korker Cake Banner was fun but it's got me thinking about other ways of decorating with korkers, too: party tables, miniature streamers hanging from doorways, garland on a kid's table... hmmm, what else can you think of?
What you need to make a Korker Cake Banner:
grosgrain ribbon in any width (I used 1/8" and 1/4", 1 spool of each color)
dowels (1/4" work best, buy these at craft or hardware stores)
wooden clothespins
cookie sheet
spray starch (optional)
lighter
embroidery floss or string
straws or chopsticks
hot glue or other adhesive
frosted cake
The first thing we're going to do is curl the ribbon to look like korkers. Korker bows are those adorable hair bows with curly-cue ribbons:
Preheat your oven to 275 degrees Fahrenheit. Check to see if your dowels will fit in your oven. If not, cut the dowels to the right size.
Take one end of ribbon and wrap it around a dowel a couple of times. Then secure it to the end with a clothespin.
Start wrapping the ribbon somewhat loosely, then push it upwards to get as much ribbon on the dowel as possible without overlapping the ribbon.
Keeping wrapping and pushing together until you get to the end of the dowel, then use another clothespin to hold it on. Repeat with as many ribbons as you want.
To help the ribbon keep its korker shape, spray with some spray starch (optional). Then place the dowels on top of a cookie sheet and bake in your preheated oven for 25 minutes.
Take the cookie sheet out of oven and let ribbon cool on the dowels, then spray with more spray starch. When they are cool and dry, start unwrapping carefully so as not to tangle or otherwise mess up the cute korker shape of the ribbon. I twist it in the opposite direction to loosen and take it off the dowel little by little.
Now you want to pass a flame quickly over the ends of each korker to seal and prevent fraying. My ribbons turned out to be all different lengths since my dowels were different lengths but I like the look of it.
Lay all the ribbons out on a flat surface. Slide a piece of string or embroidery floss underneath one side, making sure to catch all the ends of your ribbons. Then tie a knot on one side. (I found it worked better to just tie one side of the ribbons, then start attaching it to the cake, then tie the other side.) Don't cut the string.
Now put your straws or chopsticks into the cake at whatever angle you want...just be sure they're in the cake deep enough to support the weight of the ribbons (trust me, you'll know when you start attaching the ribbons if they need to go deeper).
So that the string doesn't slide right down the straw, put a dollop of hot glue at the top of each straw. I let it dry and used the dollop just for the knot to rest on, but you could just glue the knot right on there to really secure it to the straw. Attach the first side of ribbons to one straw and try to keep the other end of the ribbons away from your yummy frosting.
Once the first side is on the cake, you'll be able to tell where the other knot will need to be. On my first attempt, I tied both knots ahead of time and ended up cutting one out and re-doing it once the first side was on the cake.
Now tie the other ends of ribbon with your string and attach it to the second straw. Trim (and heat seal) ribbons again if necessary. Ta-da!
This Korker Cake Banner was fun but it's got me thinking about other ways of decorating with korkers, too: party tables, miniature streamers hanging from doorways, garland on a kid's table... hmmm, what else can you think of?
Monday, June 20, 2011
Cake Banner Bonanza
If you have been around the crafty blogland or Pinterest lately, you've seen all the adorable cake banners people have been making. I'm a bit obsessed lately and even made a whole Pin Board of them.
While I've been pinning, I've been thinking about making my own version of a cake banner. So I made one and I'm excited to tell you that today I am guest posting on a great blog, The CSI Project, with a tutorial for my Korker Cake Banner!
I haven't seen any korker cake banners anywhere else so I think this a brand new technique, and you're getting first dibs. If you make your own, make sure to leave me a comment with a link to the photo so I can check it out!
If you're a new visitor from The CSI Project, welcome! Check out my other 4th of July tutorial on how to make your own Star Spangled (Paint Chip) Banner.
Until then, I wanted to share a few of my favorite cake banners from around the web:
Now don't you want to make one, too?
Thursday, June 2, 2011
Sail Away with Me
Memorial Day brought summer to North Carolina. The heat has got me thinking about being out on the water somewhere with My Sweets and Little Sweets.
So, yesterday I made an Etsy treasury called "What's the Scuttlebutt, Sailor Girl" and this morning it made it to the front page of Etsy! For those who don't know, treasuries are a collection of 16 things you've found on Etsy. A little bit like Pinterest but just for Etsy. There are hundreds of treasuries created each day so making it to the front page (the home page, www.Etsy.com) is a big deal... even has its own acronym (FP). Click here to see what it looked like with my SweeterThanSweets treasury on it!
Here are some of the finds from my treasury to get you in the summer spirit with me:
Your yacht or mine? Oh wait, I don't have a yacht. Yours, then.
Tuesday, May 17, 2011
Tuesday, April 12, 2011
I'm Featured, You're Featured! (How to Get Your Blog or Etsy Shop Featured)
{List is Updated as of 8/5/11}
Do you want your Etsy shop and/or blog to get featured on some amazing and popular blogs for free? I've been scouring the internet to get my shop and this blog featured and I want to share what I've found with you!
Here are my features from this past week:
EtsyStrut
HGTV.com Forum (no idea who posted this link to my blog, but I got 58 visits from it)
and one more from a few weeks ago: Handmade Top 10
These features have improved the visibility of my shop and blog noticeably. To prove it to you, here are the stats from Google Analytics (total views for my shop and my blog combined):
Week of March 28th - April 3rd:
430 visits
Week of April 4th - 10th:
1,277 visits
Free advertising really works! Now I want to share with you a list of high-profile sites I've found that will feature you for free. I did the digging for you, so the links will take you directly to the page where they're taking submissions (click on the button to go to the homepage). This list is sorted by category but there is some overlap here, so check out every category:
Craft Tutorials & Recipes:
http://www.oneprettything.com/?page_id=19
http://contact.tipjunkie.com/
http://totallytutorials.blogspot.com/2009/03/submit-your-tutorial.html
Fun Family Crafts will feature your tutorial or recipe in their visual library of free craft ideas from toddler to teenager.
http://funfamilycrafts.com/submit-a-craft/
http://www.thecraftycrow.net/submissions.html
http://tatertotsandjello.blogspot.com/p/get-featured-on-tatertots-jello.html
http://todayscreativeblog.net/about/
http://www.craftbits.com/crafts/submissions
http://www.makeandtakes.com/spotlight/submit
http://www.howdoesshe.com/submit-an-idea-2
Mod Podge Rocks shows off your Mod Podge-y projectcs with 5,600 followers. Just send her an email.
http://www.modpodgerocksblog.com/
Celebrations at Home has over 2,100 followers and features craft tutorials and party ideas.http://celebrationsathomeblog.com/submissions
http://www.craftaholicsanonymous.net/2011/01/my-bloggy-new-years-resolutions.html
http://dollarstorecrafts.com/submit/
http://childmade.com/add_links.php
http://craftgawker.com/submit/
http://www.isharecrafts.com/submit-new/
http://www.isharefunfood.com/submit-new/
http://www.ishareprintables.com/submit/
http://www.ohcrafts.net/contact.php?subject=3
http://www.u-createcrafts.com/p/submit-tutorial.html
Etsy Shops/Products:
http://craftgossip.com/suggest-a-link/
http://www.handmadeology.com/submit-your-etsy-items/
http://www.handmadeology.com/submit-your-etsy-treasuries/
http://www.handmadeology.com/submit-your-blog-post/
http://www.hearthandmadeblog.com/get-featured/
http://www.handmadetop10.com
http://www.thehandmadegiftguide.com/2000/10/submit-treasury.html
Parties and Events:
Hostess with the Mostess has beautiful photos of every kind of party, as well as recipes, tutorials and printables.http://www.hostessblog.com/contact-us/#real-parties
http://designdazzle.blogspot.com/2008/11/share-your-awesomeness.html
http://www.thetomkatstudio.com/contact/
http://catchmyparty.com/login
Birthday Girl features your gorgeous birthday party photos.http://www.birthdaygirlblog.com/2010/05/birthday-girl-party-submissions.html
There are so many great blogs out there... If none of these are in your niche, here's how to create your own list of places where you'd like to be featured:
- Check out a blog you love.
- See if the blog has a sidebar or a page with all the places they've been featured, then click on each of those sites that has featured them.
- Look around for a "contact me" or "get featured" option on the featuring blog.
- Submit your project and see what happens!
Any other great high-profile sites that you know of that I can add to this list?
Subscribe to:
Posts (Atom)


