Showing posts with label fashion. Show all posts

Wednesday, November 16, 2011

Shoe Clips: Now on sale at SweeterThanSweets on Etsy!

Shoe Clips are here, just in time for Christmas!

Shoe Clips by Tricia @ SweeterThanSweets on Etsy

I just added a new line to my shop, SweeterThanSweets on Etsy: shoe clips! These are such a fun way to add some color to your basic flats, heels or sandals.

They attach to your shoes by small alligator clips, so they could actually be used as hair clips, too. Or clip them on to your favorite purse, scarf or hat and accessorize your accessories! =)

Here's a closer look at the three different styles that are on sale now in my shop:

Felt Hand-Sewn Flowers ($12 per set):


Felt Hand-Sewn Flower Shoe Clips by Tricia @ SweeterThanSweets on Etsy

Rolled Fabric Flowers ($10 per set):


Rolled Fabric Flower Shoe Clips by Tricia @ SweeterThanSweets on Etsy

Satin Flowers ($14 per set):


Satin Flower Shoe Clips by Tricia @ SweeterThanSweets on Etsy

See how nicely the third pair matches the Peacock and Pearls Hair Pin available in my shop?)

Peacock Hair Pin by Tricia @ SweeterThanSweets on Etsy


These shoe clips are great, inexpensive Christmas gifts for little girls, teens/tweens, and grown-ups (including you!).

I've got another new line that will be added to SweeterThanSweets on Etsy soon... stay tuned!

Thursday, September 29, 2011

Ombre Trend - Inspiration Board

Pin It  
Since I started my Etsy shop and this blog, I've become much more aware of fashion trends than I ever was before and I've learned terms I'd never even heard of. Let's face it, as a stay-at-home-mom, New York's Fashion Week is in no way going to affect my everyday life. But every once in awhile I come across a trend that I just love (even if I am late to the game) and this inspiration board is dedicated to my new favorite trend: ombre!

According to FabSugar, ombre comes from a French word and means "shaded." The ombre trend of late has been seen in nail polish, dresses, even hair. Here are a few amazing ombre finds from Etsy to inspire you!

Ombre Inspiration Board by Tricia @ SweeterThanSweets


(I'm pretty sure my sister had those shorts in the '80s and I was so jealous.)


Want DIY ombre? Check out these ombre tutorials!

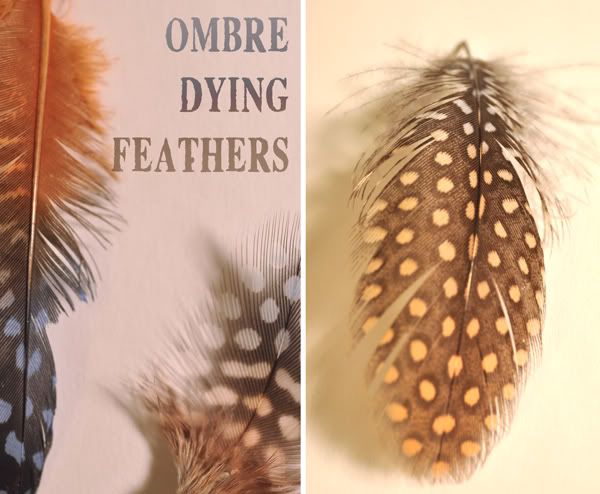
Ombre Dying Feathers by (Indie) Pretty Projects


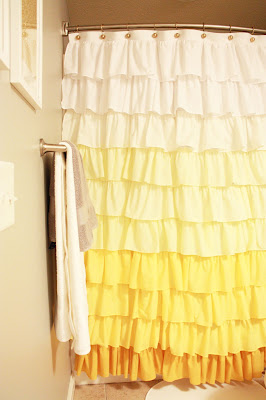
Ruffle Shower Curtain by Elle Apparel


Ombre Swirl Cake by Glorious Treats


How do you like your ombre?

Tuesday, August 9, 2011

Women's Tube Top to Toddler Tunic - Tutorial

Seven years ago, I bought a tube top from Wet Seal. I loved it and I wore it for a little while, but then it sat in my closet for years. A few weeks ago, I finally was ready to admit that I'm never going to wear it again. I decided to get more use out of it by turning it into a tunic for my daughter. Here's a tutorial so you can do it, too!


This tutorial is going to give you directions for a tube top like this (stretchy, knit fabric with no seams) along with ideas for adaptations:


You can adapt it to work for your old tube tops or your thrift store finds. Just make sure if you're sewing a knit fabric that you use a ballpoint needle in your sewing machine.

Here's a "before" shot of me wearing it 7 years ago:


First, put it on your little model and using clothespins, clip it to the right size. Don't worry about whether it's done neatly, you're just trying to figure out what the finished length and width should be.

You can also use a store-bought tunic in the correct size to see what the finished measurements should be.

Now lay it out flat to measure the length and width. Right down the numbers somewhere so you don't forget later, then unclip it. We're going to work on getting the width right first, then the length.

(Little Sweets wears 2T or 3T and the finished measurements for her were 16" long and 9" wide.)


Now calculate how many inches you need to cut out of it to get it to the right finished width. Since I wanted to it to measure 9" across when finished and it started out at 17", I cut out 7". I included a generous 1" buffer, just in case my measurements were off (better to cut out too little than too much!).

Like I said, my tube top was seamless, so I got to pick where I wanted the seam to be. I decided it would be in the middle of the back since that would be easier than doing two down the sides. So I cut out the extra 7" from the middle. I used pins to mark where I was going to cut (my tailor's chalk wouldn't write on this fabric or I would've just marked it that way). I hope the picture explains this better:


(If you already have two seams down the sides, you can cut those and the extra material out from the sides to get the right width--in this case it would've been 3.5" from each side.)

Here's another picture to explain this part. On the left you can see where I pinned to get rid of those extra 7". I decided to sew down those lines before cutting because I didn't want the ruching to unravel. On the right, you can see what it looked like after it was sewn:


Then cut out the extra fabric and save it so you can make straps later.


Now, fold it in half lengthwise with right sides together and raw edges aligned. Pin in place and sew to create the seam in the back.


Now it's the right width and we need to work on the length. My tube top had an empire waist so I cut it into two pieces right at the bottom of the ruching. (If your tube top doesn't have details like this empire waist and ruching, the easiest way to do this part would be to cut off some fabric from the bottom and do a simple hem--and you'd be done!)


I wanted the ruched part to be 5" long to get the correct finished length of 16", so I measured and marked with a pin where to cut and sew (remember your seam allowance.)


Now you can sew along the marked line.

Oops! I realized after I sewed it that I did it wrong. Time for the seam ripper (it gets a lot of use in my house).


What did I do wrong? I sewed it like I usually sew quilting fabric, making sure not to pull on it. But this fabric is stretchy and I needed to pull it while sewing to make sure that it would stay stretchy. Here's the right way... see how it's pulled taut? That will allow it to stretch after it's sewn.


(I added this extra step of sewing along the cut edge before I sewed the two parts together to make sure that the ruching didn't unravel. If you know how to sew and your fabric is just a regular cotton/knit, you can skip this extra step.)

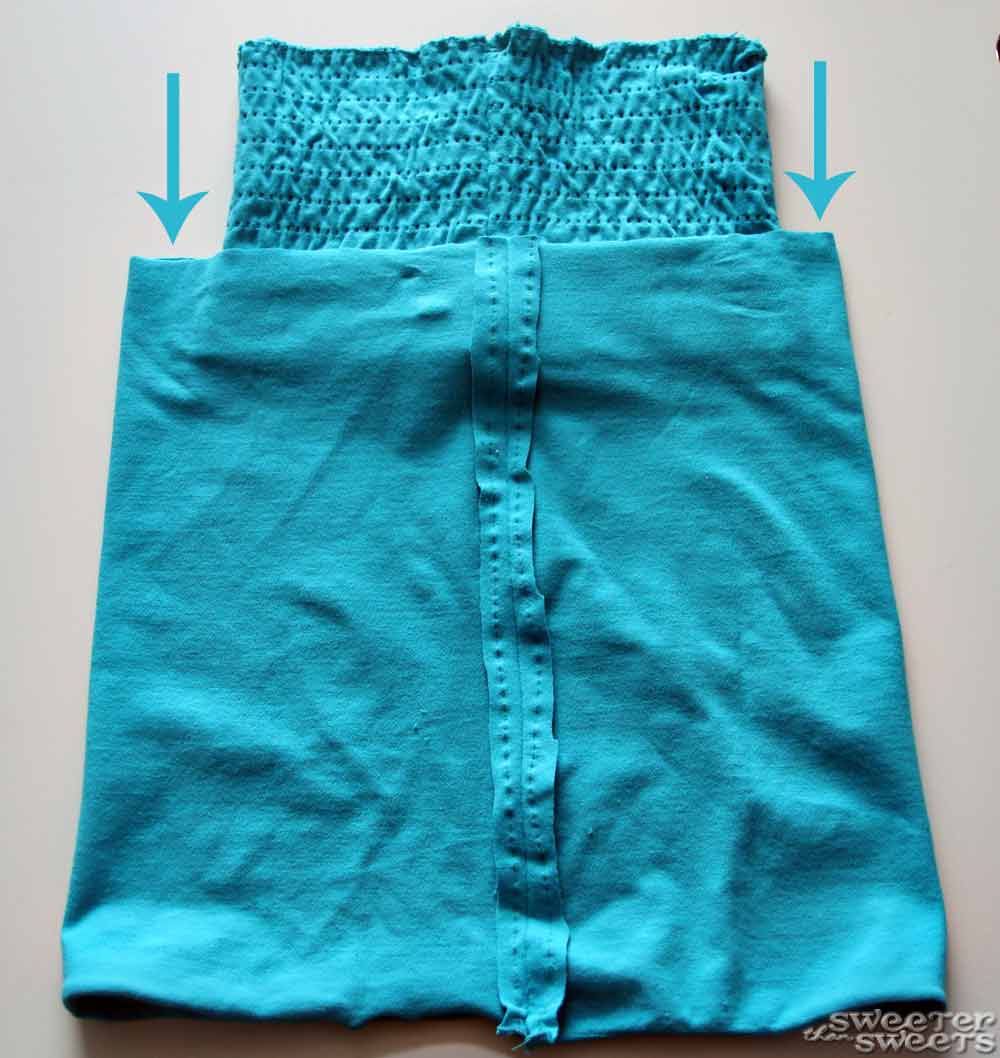
Okay now it's time to put the top and bottom together. This next photo shows how to start putting it together, with ride sides facing and the seams aligned:


Tuck the top part all the way into the bottom part and align the cut edges. Since the top is clearly narrower than the bottom, you'll need to do some more stretching as you sew. To do that, first pin where the seams are aligned (in the back) like you see in the next photo. Then pin on the other side (the front). Then stretch it evenly and add a pin on each side. This will show you how much you need to stretch as you sew.


Hope that makes sense. If not, keep your seam ripper handy! Nothing wrong with trial and error when you're sewing. =) When the two parts are sewn together it should look like this and it should be the right length and width:


Go back to the piece you cut out and cut some pieces long enough for straps. You may need to measure your model (or correctly-sized tunic) for this. I chose to gather the ends of each strap to add a little flair so I cut the straps much wider than they needed to be. See Step 2 of this tutorial to learn how to gather if you've never tried it before--it's very easy!


Put the tunic on your model and pin the straps where they should be... Little Sweets sits motionless when the TV is on so I knew that would be the perfect way to get this part done. Just be careful with the sharp pins, especially when you take it off! I liked the idea of cris-crossing the straps since I had long enough pieces of fabric left over.


Flip the tunic inside-out and carefully move the pins to the other side so you can see them as you sew. This photo shows it before I moved the pins to the other side:


Sew above the gathered seam (I sewed in the ditch where the ruching starts in order to hide the seam), then remove the gathering threads and trim the extra material. And here it is:


All done! Now your favorite tube top (or thrifted find!) can have a second life as a cute toddler tunic.

I love the cris-crossed straps in the back.


With the gathered straps, you can stretch them out to make the straps look more like cap-sleeves than tank top straps too! Looks like Little Sweets likes wearing Mommy's old tube top. I hope your little one likes it, too!


Monday, July 18, 2011

Introducing Mini Fascinators

Question: What do peacocks, the Royal Wedding and the Kentucky Derby have in common?

peacock by Tricia @ SweeterThanSweets

Answer: A spectacle of feathers!

Feathered fashion trends have intrigued me so much that I decided I needed to add a new line to my Etsy shop--Mini Felt Fascinators for the little ones in your life!

As of right now, I'm making them out of felt and adding a bit of glam with rhinestones, pearls and other embellishments.

Mini Felt Fascinators by SweeterThanSweets on Etsy


Mini Felt Fascinators by SweeterThanSweets on Etsy

I've been experimenting with craft feathers but I just don't think they're practical when it comes to children's accessories. (Yes, I am implying that feathers are completely practical when it comes to grown women's accessories.) What do you think? Would you want your little girl to have an all-access pass to real feathers?

Thursday, June 2, 2011

Sail Away with Me

Memorial Day brought summer to North Carolina. The heat has got me thinking about being out on the water somewhere with My Sweets and Little Sweets.

So, yesterday I made an Etsy treasury called "What's the Scuttlebutt, Sailor Girl" and this morning it made it to the front page of Etsy! For those who don't know, treasuries are a collection of 16 things you've found on Etsy. A little bit like Pinterest but just for Etsy. There are hundreds of treasuries created each day so making it to the front page (the home page, www.Etsy.com) is a big deal... even has its own acronym (FP). Click here to see what it looked like with my SweeterThanSweets treasury on it!

Here are some of the finds from my treasury to get you in the summer spirit with me:

Nautical Inspiration Board by SweeterThanSweets


Your yacht or mine? Oh wait, I don't have a yacht. Yours, then.

Saturday, May 7, 2011

The Greatest Two Minutes in Sports

I have to admit that I've never paid much attention to the Kentucky Derby, said to be "the greatest two minutes in sports."

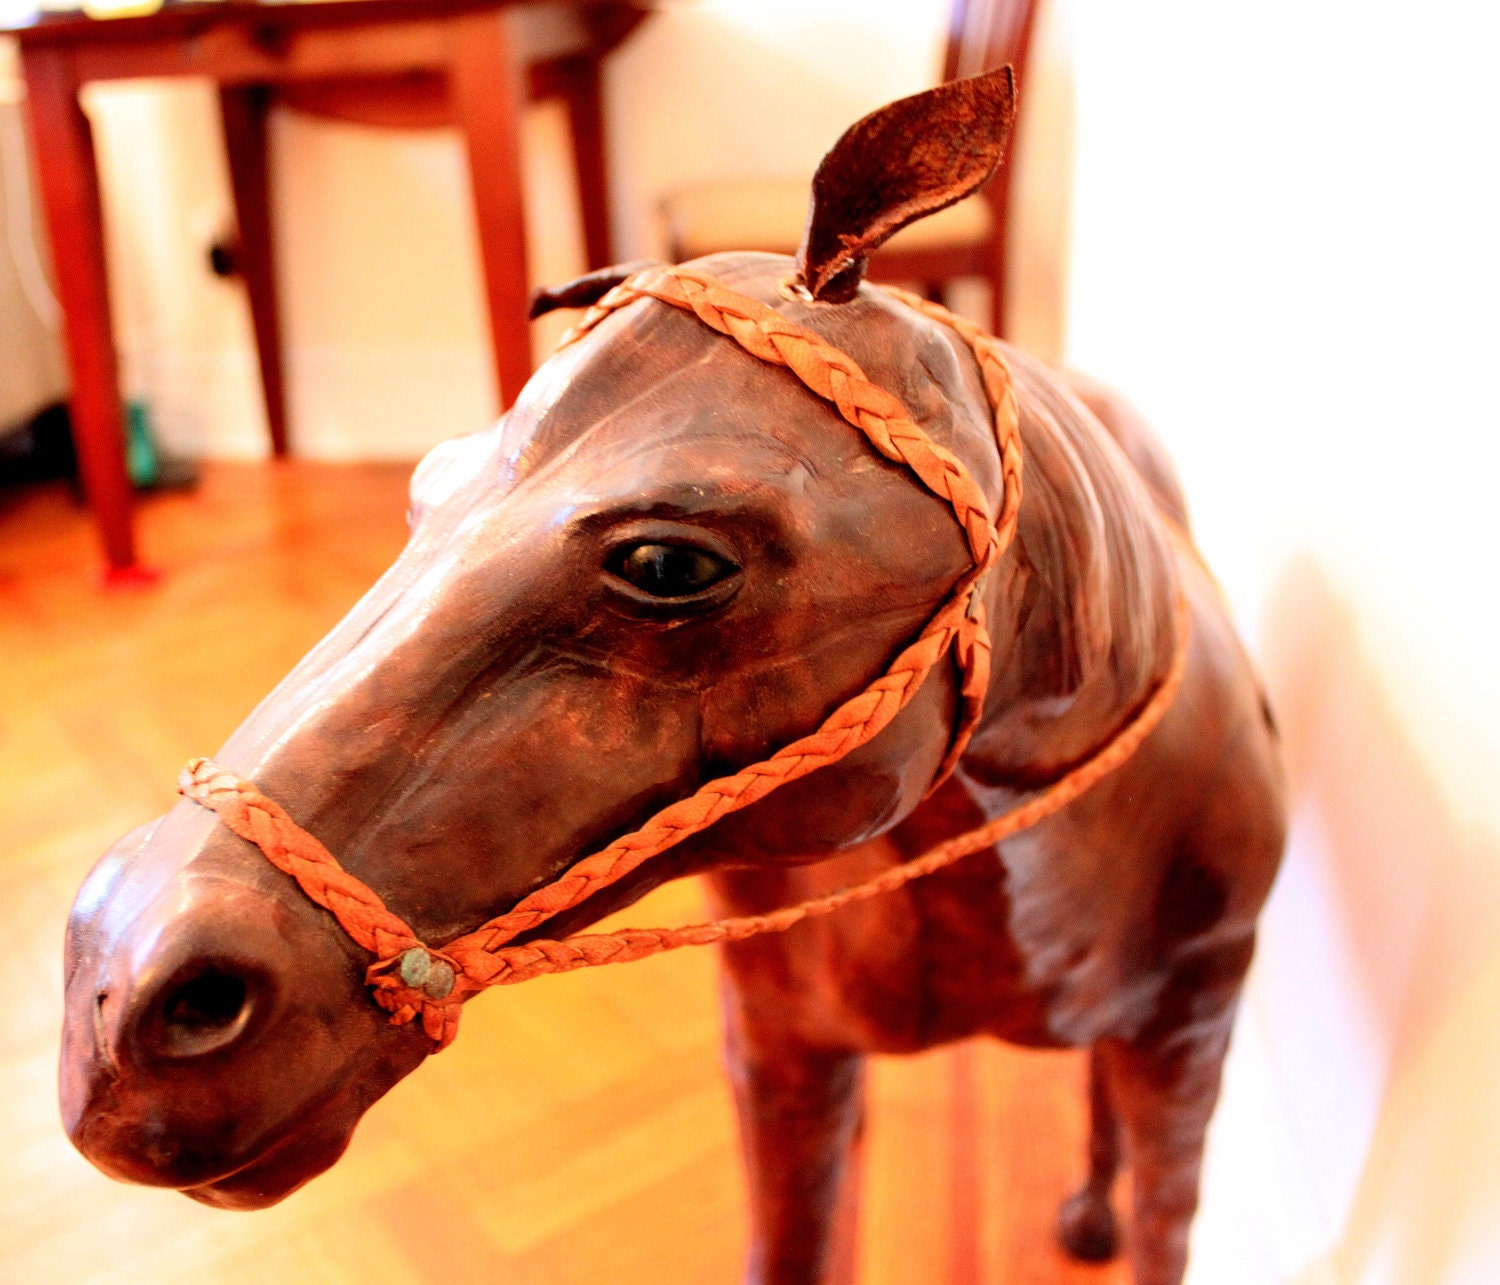
British Equestrian Leather Horse Sculpture by Fivehands

But after the Royal Wedding, I'm so intrigued by those amazing, beautiful and odd hats that will surely be on display at the Derby today.

Sinamay Feather Kentucky Derby Hat by lilacpop

If you are planning your outfit for a Derby party, you must check out the official Kentucky Derby's guide to Women's Attire. You'll find some very suitable hat options for sale at Taissa Lada Designs, ArturoRios and lilacpop. You might also want to stop by Stiletto Sports Magazine's Girl's Guide to the Kentucky Derby.

The other thing that intrigues me about the Kentucky Derby is a Mint Julep. I've never tried one but I just might have to today. I created a treasury inspired by the drink that is the legend. Over 120,000 of them will be served today! Here are a few of my favorite mint julep-inspired finds on Etsy:

Mint Julep by SweeterThanSweets


Are you craving a Mint Julep yet? Get the official Mint Julep recipe. Then come back here and let me know if they actually taste good. =)

Wednesday, March 30, 2011

Little Sweets' Spring Look

The title of this post may be a bit misleading, because it's not exactly Little Sweets' Spring Look but it would be if money were no object... I splurged on the shortalls, but everything else is just dreaming. =)

Little Sweets' Spring Look by SweeterThanSweets
3. Shades of Pink Satin Flower Headband from SweeterThanSweets (had to sneak it in even though Little Sweets refuses to wear any headbands!)
5. Tall Flower Border from Uppercase Living (Stems in Green Tea, Flowers in Hot Pink)
7. Dusty the Bunny Rabbit from tzburps


Ever notice how your kids are always dressed nicer than you are? Or is it just me?

Monday, March 28, 2011

Featured on The Handmade Gift Guide

A few weeks ago, I made a treasury on Etsy, Spring Break at My House. I just found out that this treasury was featured on The Handmade Gift Guide blog, which is an awesome resource for getting gift ideas and supporting artisans. It's SO fun to be featured on a blog I love!


Friday, February 18, 2011

Custom Orders: Baby Gifts by SweeterThanSweets on Etsy

I've recently been asked by a few friends to make some custom orders. I wanted to share them with you here because they won't be for sale in my shop. I love making things specifically for a customer and it gives me ideas of what people actually want to buy.

First, a photographer friend asked for a set of satin flower headbands for the newborns she photographs to wear. So fun! Little tiny new people will be wearing my creations in their baby pictures! I made the satin flowers with a clip on the back so that the headbands and flowers can be used interchangeably to match baby's outfit. I bought the headbands themselves from this Etsy shop (they are super soft and stretchy). I'll probably make another set available on my shop for other photographers or new mamas who can't get enough headbands for their baby girls. (Check out my other satin flower headbands here.)
handmade satin flower headband set

Here's a baby shower gift set for a new baby boy, complete with a hooded towel set, two burp cloths, a onesie and a sensory circle blanket. I really loved making this set and another one with the same fabrics will be available soon. (A girl version, minus the blanket, is already for sale on my shop.)
handmade gift set for baby boy

Then I made a big sis/lil sis set for a friend of mine from elementary school who is having her second daughter soon. I just love pink, green & brown together!
handmade big sis/lil sis shirts

And for a little boy who loves tractors and is turning 2 soon, a John Deere tractor shirt. The green and yellow background is actually made of felt, so it's soft to the touch. The back of the shirt has the John Deere logo appliquéd at the top. This one actually will be for sale on my shop because my friend's little boy needs a short-sleeved shirt. A 1-year-old birthday shirt is already available online.
handmade John Deere tractor 2nd birthday shirt

Are there custom orders you want me to make? Or any ideas of other things you'd like to see in my shop? I'd love to hear from you!

Tuesday, February 1, 2011

Little Sweets Turns 2! (and the Giant Cupake Cake)

Why is my Little Sweets obsessed with cupcakes these days? Well, I'm not sure, but it might kind of be my fault. Maybe.

giant cupcake cake
...First came the giant cupcake cake...
giant cupcake and regular cupcakes
...and then, teeny tiny (i.e., regular-sized) versions
of the giant cupcake cake!

I've been slowly adding clothing in my Etsy shop and I am planning to make some birthday shirts for bigger kids (up to 5T for now). So I had to practice, right? (More will be available soon, for boys and girls!) Wow, did the cupcake theme go over well in this house. It's still going.

In case you're interested in making this giant cupcake cake for your own little sweets, I used a Wilton pan and followed these directions from Oh, Sugar! to make the candy cupcake liner. Yes, all the other little sweetses who came to the birthday party, that is indeed pink candy. Super easy to make and in my humble opinion, the cupcake liner turned out MUCH better than if I'd tried to frost that part.

Oh, and the "confetti" was royal icing that I piped in big blobs on waxed paper. I put them on the cake upside-down so the smooth part (the part that was touching the waxed paper) would show. Very easy and very cute!