


First, you need to get some vanilla beans and make vanilla sugar. If you've never worked with vanilla beans before, there is a great tutorial here (she also tells you how to make vanilla extract and provides a different way of making vanilla sugar). You can find vanilla beans at gourmet food stores (I got mine at World Market--love that place!), on amazon.com or plenty of other online sources.
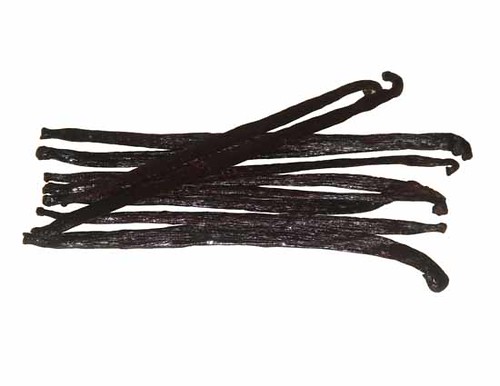 |
| Photo: acfou |
To make the vanilla sugar, scrape the seeds from one whole vanilla bean and mix with some sugar. You have to wait at least a week before using it so that the vanilla can fully permeate the sugar.
 When you open the container after a week, an amazing smell will emerge!
When you're ready to make the scones, first cut a vanilla bean into 2/3 and 1/3, lengthwise. Scrape the seeds from the bigger portion and mix them with flour, vanilla sugar, salt, baking powder and seeds scraped from 2/3 of the vanilla bean. At this point, the mixture will look like a typical bowl full of dry ingredients for baked goods.
Then for the butter. When you're making pastries, including pie crusts and scones, you want your butter to be cold and cut into small pieces. That's because cold butter pieces will melt as the pastry bakes, giving it that flaky texture you want. Chop your cold butter up into pieces and add it to the bowl of dry ingredients.
 Next, you'll need to "cut in" the butter. The best tool for this is a pastry blender. Here is what mine looks like:
 You can also find pastry blenders with wire "blades." If you don't want/need a pastry blender, you can use two knives to cut in the butter. I used to use my potato masher but I finally gave in to buying this pastry blender because I make scones at least once a month. (Yes, I'm a bit obsessed with scones.)
Here's what the bowl will look like after cutting in the butter:
 This is what scone recipes mean when they say "coarse crumbs," though admittedly I have some very large chunks in there... I get lazy sometimes.
Add some buttermilk (or a mixture of milk and lemon juice, which is what I do), eggs and vanilla extract. Stir until a ball of dough forms.


When you're ready to make the scones, first cut a vanilla bean into 2/3 and 1/3, lengthwise. Scrape the seeds from the bigger portion and mix them with flour, vanilla sugar, salt, baking powder and seeds scraped from 2/3 of the vanilla bean. At this point, the mixture will look like a typical bowl full of dry ingredients for baked goods.
Then for the butter. When you're making pastries, including pie crusts and scones, you want your butter to be cold and cut into small pieces. That's because cold butter pieces will melt as the pastry bakes, giving it that flaky texture you want. Chop your cold butter up into pieces and add it to the bowl of dry ingredients.


Here's what the bowl will look like after cutting in the butter:

Add some buttermilk (or a mixture of milk and lemon juice, which is what I do), eggs and vanilla extract. Stir until a ball of dough forms.

Here's another place where I get lazy when baking scones: I scoop the dough onto a cookie sheet as though it were cookie dough. Hence, my scones don't look like your typical triangular scones and sometimes get mistaken for cookies. Instead of scooping, you can turn the dough onto a floured surface, roll dough into a circle (or two) of about 3/4" thickness, then use a pizza cutter to cut into wedges. Separate the wedges and move onto a cookie sheet. But, like I said, I just scoop. It saves a lot of time when you make scones as often as I do.
After baking, let the scones cool completely while you make the glaze: Scrape the seeds from the remaining 1/3 of the vanilla bean and mix with powdered sugar, vanilla extract and milk. Drizzle as much or as little as you'd like over the cooled scones and enjoy your yummy kitchen creation!
After baking, let the scones cool completely while you make the glaze: Scrape the seeds from the remaining 1/3 of the vanilla bean and mix with powdered sugar, vanilla extract and milk. Drizzle as much or as little as you'd like over the cooled scones and enjoy your yummy kitchen creation!

Yield: 30 scones
Vanilla sugar
1 vanilla bean
1 cup sugar
Scrape seeds from one whole vanilla bean and mix with 1 cup sugar. Store in sealed container at least one week before using.
Scones
3 cups flour
½ cup vanilla sugar
½ tsp. salt
1 T. baking powder
2/3 vanilla bean, seeds scraped
½ cup cold butter, cut into small pieces
1/2 cup buttermilk OR 1 T. lemon juice + ½ cup milk (combine and let sit for 5 minutes)
1/2 cup buttermilk OR 1 T. lemon juice + ½ cup milk (combine and let sit for 5 minutes)
2 eggs, slightly beaten
1 tsp. vanilla extract
Preheat oven to 400°F.
In a large bowl, combine flour, vanilla sugar, salt, baking powder and seeds scraped from 2/3 of a vanilla bean. Mix until combined.
Cut in butter pieces with two knives or a pastry blender until mixture resembles coarse crumbs.
Add buttermilk (or milk and lemon juice mixture) to dry ingredients along with eggs and vanilla. Stir all ingredients until a ball of dough forms (may need to add a small amount of milk).
Scoop by rounded tablespoon onto cookie sheet.
Bake for 13-14 minutes; cool on a wire rack.
Glaze
1/3 vanilla bean, seeds scraped
1 cup powdered sugar
½ tsp. vanilla extract
2 T. milk
Combine all ingredients. When scones are completely cooled, drizzle glaze over tops.

you're awesome. here are the reasons why-
ReplyDelete1) you plan a week ahead with your baking! wow!
2) you know how to put a pdf onto your blog (how did you do that?)
3) you know exactly what people need pictures of: the tools of baking, consistency of the flour, the vanilla sugar
for what occasion do you usually make scones?
Aw, shucks. You're so sweet! Number 2 made me laugh because it took me like 2 hours to figure it out... shouldn't take as long next time! It was pretty easy to upload it to google documents (https://docs.google.com), but my problem was in creating and saving the file as a pdf.
ReplyDeleteI make scones for our family for breakfast or snacks but also that is always what I bring if we're doing a brunch/breakfast potluck type thing, like for a playdate or for Sunday school. So far I've just brought my chocolate chip scones and cranberry oatmeal scones but now I can add this recipe into the rotation!
Looks Great! I'll have to try it, but I do have a HARD time with the whole plan a week ahead thing lol. I've found Vanilla Beans at Walmart in the the past, though I'm sure they weren't as good quality as ones from world market. Celesa-Lilly Bunns Boutique
ReplyDeleteCelesa--I know... I made the vanilla sugar and had a hard time waiting a whole week to make these scones. Just make the sugar today and put it away until you remember it. =) I should put a big disclaimer at the top about the prep time!
ReplyDeleteYum, I'll have to try these! Thanks for sharing!
ReplyDeleteYou're welcome, Martha. Let me know if you try them out!
ReplyDeleteThanks for the recipe!
ReplyDeleteyum! i'll have to try these :)
ReplyDeleteDelicious! I am happy to be your newest follower!
ReplyDeleteBakery Equipment
Giving a compliment is the perfect way to show you care about someone,and it is a great way to express how much you appreciate another person. mail order weed
ReplyDeleteVery Useful information, this is both good reading for, have quite a few good key points and I learn some new stuff from it too. THANKS. Electrical and Electronics Engineering
ReplyDelete