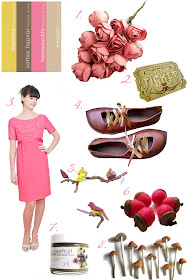
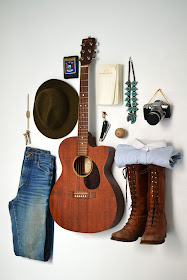
I know Summer just began, but Pantone recently released their Fashion Trend Color Report for Fall 2011. How pretty is this "Sensible and Spirited" palette of Bamboo, Coffee Liqueur, Honeysuckle and Nougat?
These hot and humid North Carolina days are already making me think about the cooler temps to come!
Thursday, June 30, 2011
Tuesday, June 28, 2011
Do you Pin?
I got sucked in to Pinterest a few weeks ago and I am loving it. If you haven't heard of it, it's like a combination of Facebook and Google Image Search. You can share your favorite images from anywhere on the web with friends and strangers alike.
You categorize your Pins into whatever Boards you want. You can even make a Board out of all the things that you've made:
If you're on Pinterest, let me know and I'll follow you! If you want to follow me, click here and below my picture on the left side, click "Follow All."
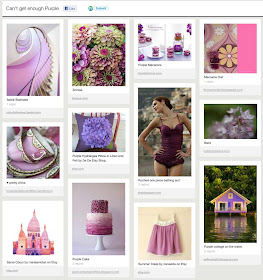
It's one of those websites where you can spend hours clicking away to get inspiration. Here's my favorite board:
Not on Pinterest yet? Send me your email and I'll request an invite for you.
A side note on Pinterest, the Psychologist in me just loves how they've designed the sign up process. Instead of just clicking "Register", you click "Request an Invite". Instead of it seemingly taking forever to get you signed up and registered, you get an email saying you're "On the Waitlist." After a few days of checking email incessantly, you get your Invite. Wow, doesn't that make you feel special?
Brilliant psychological marketing strategy, in my opinion.
Monday, June 27, 2011
Korker Cake Banner - Tutorial
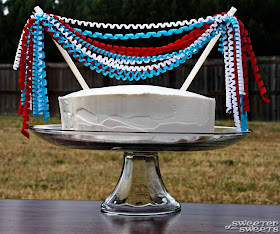
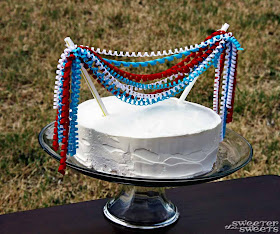
In case you missed my guest post over at The CSI Project, here's my tutorial for a new kind of cake banner, a Korker Cake Banner... it's a fun and festive cake topper for any celebration, no cake decorating skills necessary!
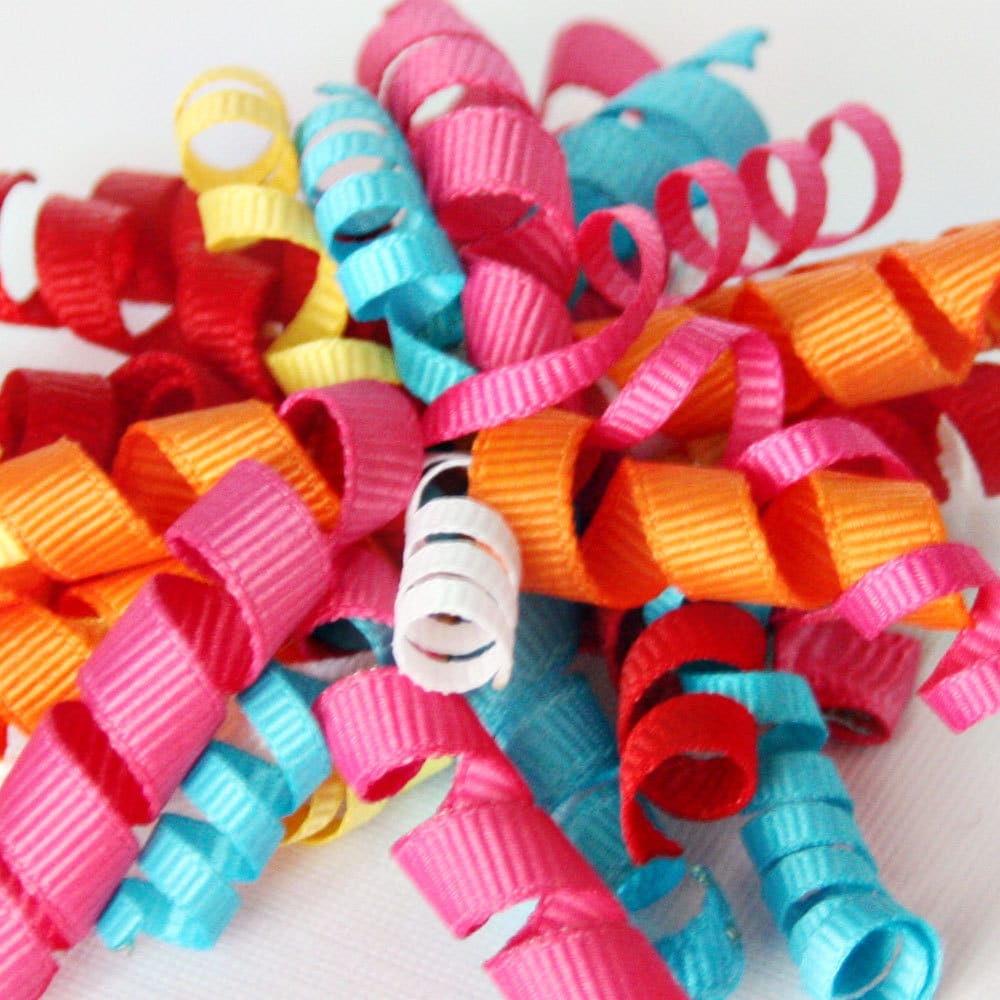
The first thing we're going to do is curl the ribbon to look like korkers. Korker bows are those adorable hair bows with curly-cue ribbons:
Preheat your oven to 275 degrees Fahrenheit. Check to see if your dowels will fit in your oven. If not, cut the dowels to the right size.
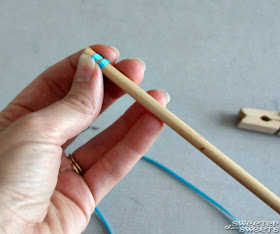
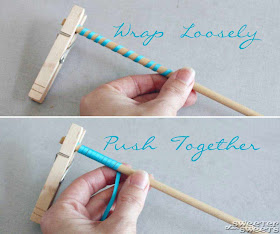
Take one end of ribbon and wrap it around a dowel a couple of times. Then secure it to the end with a clothespin.
Start wrapping the ribbon somewhat loosely, then push it upwards to get as much ribbon on the dowel as possible without overlapping the ribbon.
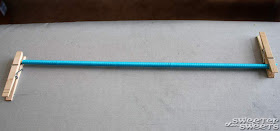
Keeping wrapping and pushing together until you get to the end of the dowel, then use another clothespin to hold it on. Repeat with as many ribbons as you want.
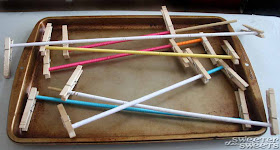
To help the ribbon keep its korker shape, spray with some spray starch (optional). Then place the dowels on top of a cookie sheet and bake in your preheated oven for 25 minutes.
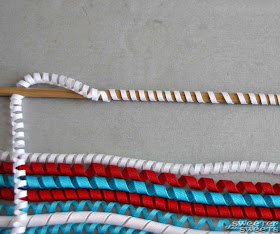
Take the cookie sheet out of oven and let ribbon cool on the dowels, then spray with more spray starch. When they are cool and dry, start unwrapping carefully so as not to tangle or otherwise mess up the cute korker shape of the ribbon. I twist it in the opposite direction to loosen and take it off the dowel little by little.
Now you want to pass a flame quickly over the ends of each korker to seal and prevent fraying. My ribbons turned out to be all different lengths since my dowels were different lengths but I like the look of it.
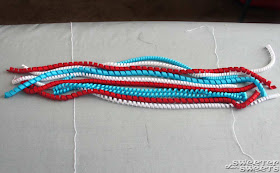
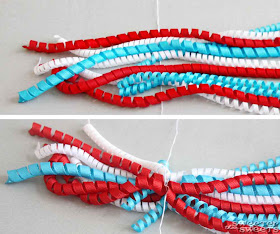
Lay all the ribbons out on a flat surface. Slide a piece of string or embroidery floss underneath one side, making sure to catch all the ends of your ribbons. Then tie a knot on one side. (I found it worked better to just tie one side of the ribbons, then start attaching it to the cake, then tie the other side.) Don't cut the string.
Now put your straws or chopsticks into the cake at whatever angle you want...just be sure they're in the cake deep enough to support the weight of the ribbons (trust me, you'll know when you start attaching the ribbons if they need to go deeper).
So that the string doesn't slide right down the straw, put a dollop of hot glue at the top of each straw. I let it dry and used the dollop just for the knot to rest on, but you could just glue the knot right on there to really secure it to the straw. Attach the first side of ribbons to one straw and try to keep the other end of the ribbons away from your yummy frosting.
Once the first side is on the cake, you'll be able to tell where the other knot will need to be. On my first attempt, I tied both knots ahead of time and ended up cutting one out and re-doing it once the first side was on the cake.
Now tie the other ends of ribbon with your string and attach it to the second straw. Trim (and heat seal) ribbons again if necessary. Ta-da!
This Korker Cake Banner was fun but it's got me thinking about other ways of decorating with korkers, too: party tables, miniature streamers hanging from doorways, garland on a kid's table... hmmm, what else can you think of?
What you need to make a Korker Cake Banner:
grosgrain ribbon in any width (I used 1/8" and 1/4", 1 spool of each color)
dowels (1/4" work best, buy these at craft or hardware stores)
wooden clothespins
cookie sheet
spray starch (optional)
lighter
embroidery floss or string
straws or chopsticks
hot glue or other adhesive
frosted cake
The first thing we're going to do is curl the ribbon to look like korkers. Korker bows are those adorable hair bows with curly-cue ribbons:
Preheat your oven to 275 degrees Fahrenheit. Check to see if your dowels will fit in your oven. If not, cut the dowels to the right size.
Take one end of ribbon and wrap it around a dowel a couple of times. Then secure it to the end with a clothespin.
Start wrapping the ribbon somewhat loosely, then push it upwards to get as much ribbon on the dowel as possible without overlapping the ribbon.
Keeping wrapping and pushing together until you get to the end of the dowel, then use another clothespin to hold it on. Repeat with as many ribbons as you want.
To help the ribbon keep its korker shape, spray with some spray starch (optional). Then place the dowels on top of a cookie sheet and bake in your preheated oven for 25 minutes.
Take the cookie sheet out of oven and let ribbon cool on the dowels, then spray with more spray starch. When they are cool and dry, start unwrapping carefully so as not to tangle or otherwise mess up the cute korker shape of the ribbon. I twist it in the opposite direction to loosen and take it off the dowel little by little.
Now you want to pass a flame quickly over the ends of each korker to seal and prevent fraying. My ribbons turned out to be all different lengths since my dowels were different lengths but I like the look of it.
Lay all the ribbons out on a flat surface. Slide a piece of string or embroidery floss underneath one side, making sure to catch all the ends of your ribbons. Then tie a knot on one side. (I found it worked better to just tie one side of the ribbons, then start attaching it to the cake, then tie the other side.) Don't cut the string.
Now put your straws or chopsticks into the cake at whatever angle you want...just be sure they're in the cake deep enough to support the weight of the ribbons (trust me, you'll know when you start attaching the ribbons if they need to go deeper).
So that the string doesn't slide right down the straw, put a dollop of hot glue at the top of each straw. I let it dry and used the dollop just for the knot to rest on, but you could just glue the knot right on there to really secure it to the straw. Attach the first side of ribbons to one straw and try to keep the other end of the ribbons away from your yummy frosting.
Once the first side is on the cake, you'll be able to tell where the other knot will need to be. On my first attempt, I tied both knots ahead of time and ended up cutting one out and re-doing it once the first side was on the cake.
Now tie the other ends of ribbon with your string and attach it to the second straw. Trim (and heat seal) ribbons again if necessary. Ta-da!
This Korker Cake Banner was fun but it's got me thinking about other ways of decorating with korkers, too: party tables, miniature streamers hanging from doorways, garland on a kid's table... hmmm, what else can you think of?
Friday, June 24, 2011
Tips for Traveling with Toddlers and Babies - When You Get There
(Read about my "qualifications" to offer these travel tips on Part 1 of my Traveling with Toddlers and Babies Series.)
When you get to your destination with your kiddos, there are a few more things you'll need to think about.
If you made it through this entire Tips for Traveling with Toddlers and Babies series, you now know every single thing I know about traveling with tots. Thanks for sticking with me and I hope you feel more prepared and at ease for your upcoming trip!
As my tot gets older and as our family expands, I'm sure there will be much more to learn. If you have tips to share with me and others, please leave a comment here. I'd love to learn from you, too.
Traveling with Toddlers and Babies Series
Part 4 ~ When You Get There (you are here!)
When you get to your destination with your kiddos, there are a few more things you'll need to think about.
Wherever you go, Whatever you do
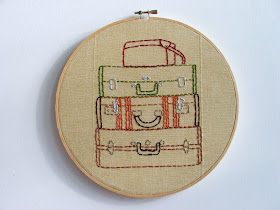 |
| Suitcase Stack by Moxiedoll |
- Make it a habit of turning around when you stand up to leave from wherever you were sitting--the train seat, the church pew, the park bench. If you do this all the time, you'll be much less likely to lose toys, sunglasses, backpacks, etc.
- If you have a newly-mobile baby and you're staying in a non-child-proofed environment, consider buying a used Exersaucer, Jumperoo or Bumbo from Once Upon a Child, Craigslist.org or a local garage sale. You can always sell it again at the end of your trip.
- There are some creative solutions for childproofing rooms like Travel Tot's Travel Childproofing Kit (I haven't tried this one but it looks great!).
- Do some research online to find out family-friendly destination-specific advice
- Have older kids keep a travel journal to remind them of what they enjoyed about the trip.
- Let them walk as much as possible, reserve the stroller rides for only when necessary.
- Don't have your heart set on your little one enjoying something that you're really looking forward to. Let them enjoy what they want to enjoy.
- This an obvious one, but play up parts of travel that might be really boring to the kids: Wow, we get to ride on a bus for 3 whole hours!!
- Do your research on kid-friendly restaurants. Sites like Urbanspoon.com can help (choose your city, then under Special Features, click on Kid Friendly).
- Use website guides or blogs written for traveling with kids at your specific destination.
- Take advantage of some good apps for traveling. My favorite free apps are Urbanspoon, Sit or Squat (locates public restrooms), Converter Plus and Google Places.
- If you have a Netflix subscription, you can get the free Netflix app to instantly watch movies in your queue.
- Also check out location-specific websites and apps, such as those offered by TimeOut, Frommer's, or Fodor's.
- This probably goes without saying, but always have snacks with you!
If you're a tourist
 |
| My Sweets and Little Sweets at the park behind Westminster Abbey |
- Plan for LOTS of stops at parks and grassy areas throughout your day to let the energy burn off! I had no idea how many parks there were in London until I went there with a 20-month-old.
- If you're a schedule/routine person like me, don't hesitate to take your baby back to your hotel for a nap in the middle of the day. It's nice for us grown-ups to have a break, too!
- ...or recline that stroller and get your baby comfy for an on-the-go-nap.
- If you're going to an amusement park, you can buy from the kid's menu (even if your kid is not eating solids yet). This is a great way to save a few dollars. (Thanks, Tiffany G.!)
- Keep a selection of toys/activities from your Busy Bag accessible for restaurants, waiting in lines, stroller rides, etc. (Be sure to keep a few packed so they're still novel for the way home!)
- If you're taking a tour somewhere that strollers are not allowed (a museum, castle, etc.), they will sometimes have hip carrier/fanny pack type things (no idea what they're really called, can you tell?). You strap it around you like a belt but there's a little platform where your kiddo can sit. That way you're not carrying his or her full body weight during the whole tour.
- If you're going to an amusement park, read up on what kind of strollers they have available for rental. Some do not recline. Some look like they're as hard as a rock. Some don't have storage basket. Better to know ahead of time so you can bring your own stroller if you need to!
If you're staying in a hotel OR with family or friends
- If at all possible, sleep in the same place every night. In our experience, moving from one place to another on trips has led to sleep issues. Consistency is key for a little one in a new and unfamiliar environment.
- Don't hesitate to rearrange furniture to suit your kid's needs.
- You may want to drape a blanket or towel over the side(s) of baby's crib or Pack 'N Play to keep the light out and the distractions to a minimum.
- Hopefully before you left, you read about crib safety. If you're unsure about the crib, rent one (check here for U.S. travel, here for international travel).
- Spread out a sheet or plastic mat under the high chair at Gramma's. If you do this, she might consider inviting you back. =)
If you made it through this entire Tips for Traveling with Toddlers and Babies series, you now know every single thing I know about traveling with tots. Thanks for sticking with me and I hope you feel more prepared and at ease for your upcoming trip!
As my tot gets older and as our family expands, I'm sure there will be much more to learn. If you have tips to share with me and others, please leave a comment here. I'd love to learn from you, too.
Wednesday, June 22, 2011
What really matters?
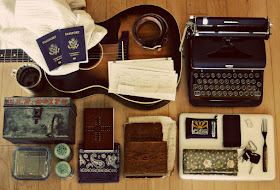
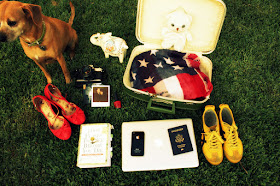
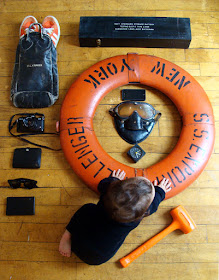
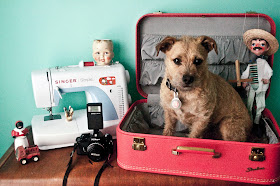
If your house was on fire, what would you take with you?
A new blog, The Burning House, asks people all around the world to take photos of their answers to this question. Here are some of my favorites:
If your house was burning, you would take the things that really matter. So why do spend so much time and money on the things that don't?
A new blog, The Burning House, asks people all around the world to take photos of their answers to this question. Here are some of my favorites:
If your house was burning, you would take the things that really matter. So why do spend so much time and money on the things that don't?
Monday, June 20, 2011
Cake Banner Bonanza
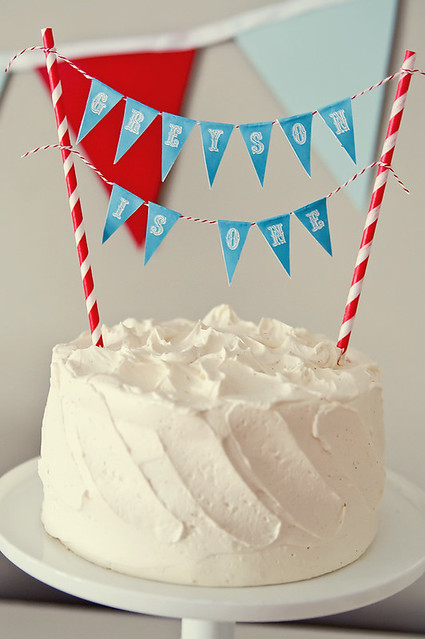
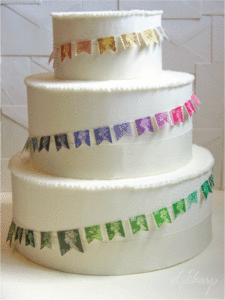
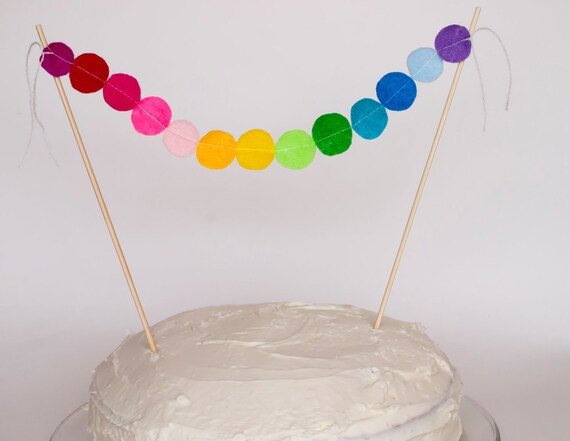
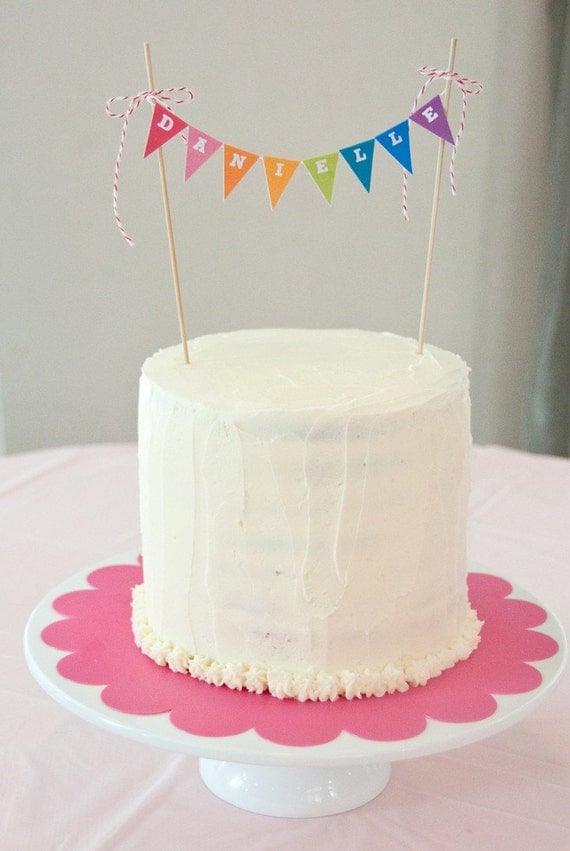
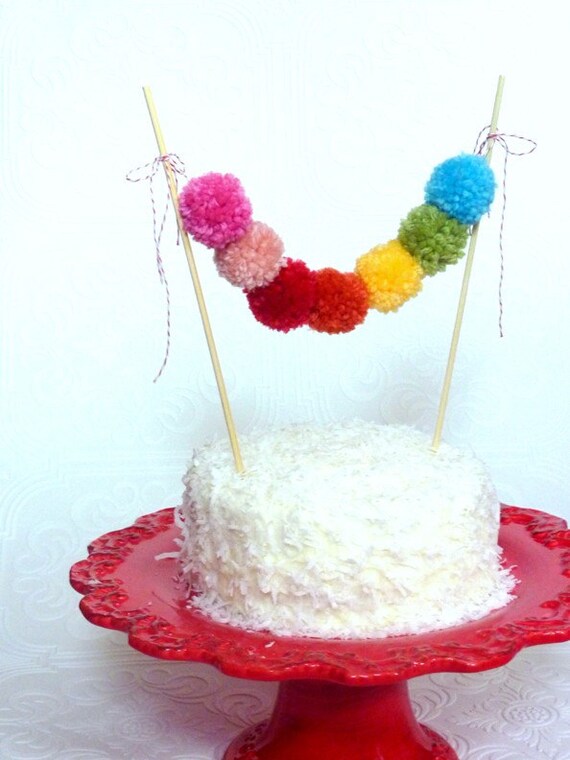
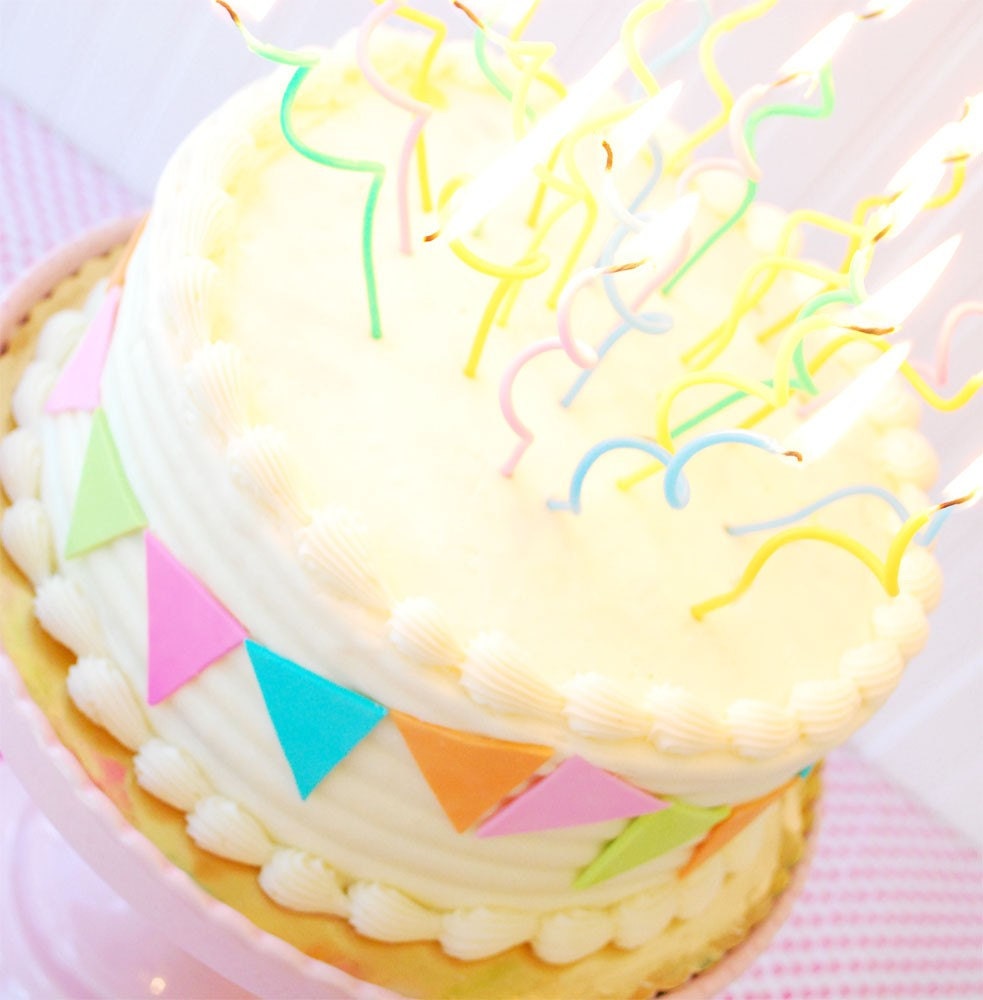
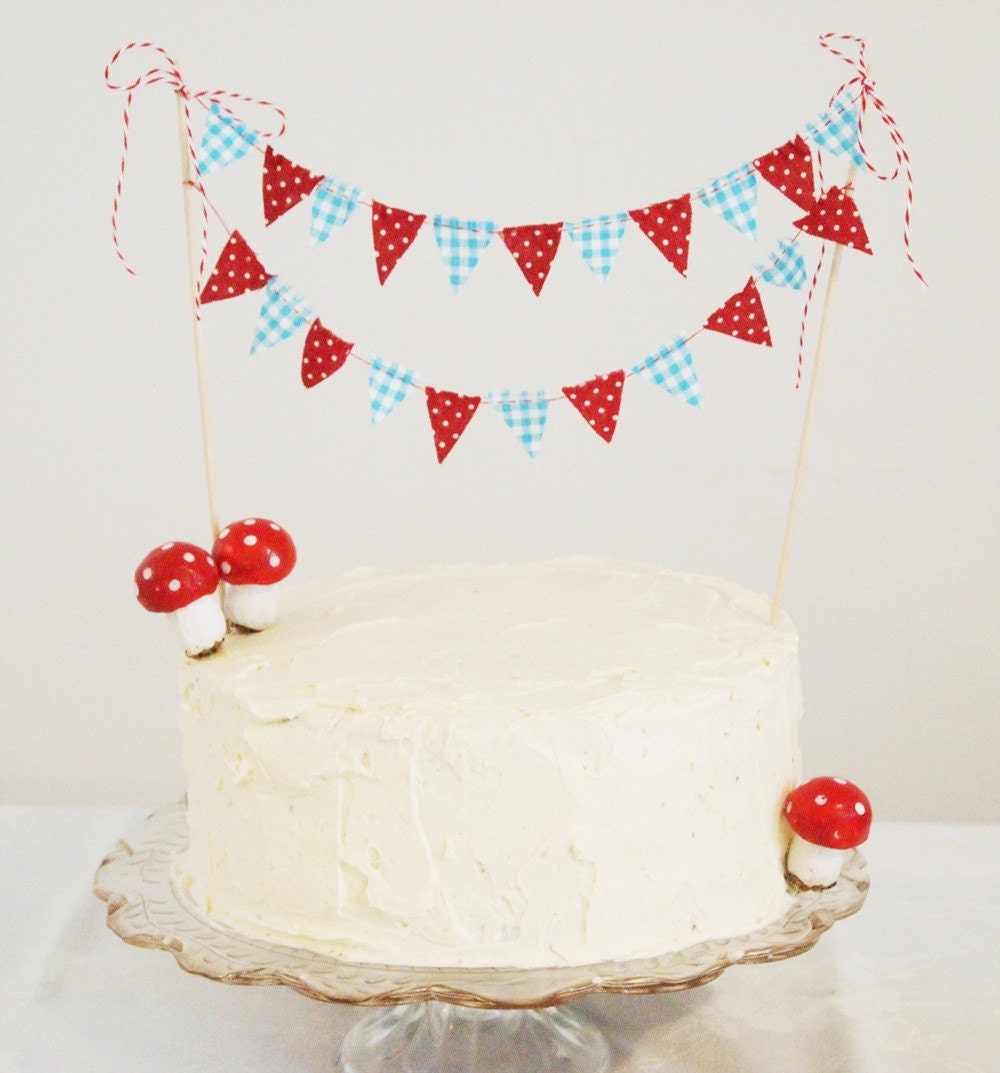
If you have been around the crafty blogland or Pinterest lately, you've seen all the adorable cake banners people have been making. I'm a bit obsessed lately and even made a whole Pin Board of them.
While I've been pinning, I've been thinking about making my own version of a cake banner. So I made one and I'm excited to tell you that today I am guest posting on a great blog, The CSI Project, with a tutorial for my Korker Cake Banner!
I haven't seen any korker cake banners anywhere else so I think this a brand new technique, and you're getting first dibs. If you make your own, make sure to leave me a comment with a link to the photo so I can check it out!
If you're a new visitor from The CSI Project, welcome! Check out my other 4th of July tutorial on how to make your own Star Spangled (Paint Chip) Banner.
Until then, I wanted to share a few of my favorite cake banners from around the web:
Now don't you want to make one, too?
Friday, June 17, 2011
Tips for Traveling with Toddlers and Babies - Travel Time
(Read about my "qualifications" to offer these travel tips on Part 1 of my Tips for Traveling with Toddlers and Babies Series.)
Traveling with Toddlers and Babies Series
Part 3 ~ Travel Time (you are here!)
Any which way you go
 |
| Single Hot Air Balloon Photograph by Lora Risley Images |
- Dress them for success! If they're small enough, put them in a one-piece outfit with feet so that they won't lose socks and they're nice and comfy (no tight waistbands) while they travel.
- Diaper them for success! Put your baby and toddler in an overnight diaper in case you can't change them as often as you normally would. Just be aware of the increased chance of diaper rash.
- No matter how strict you might be on junk food or TV time at home, you might want to make a new policy for yourself that when traveling, anything goes. Keep the kids happy! You can tell them that there are some treats that are just for traveling.
- Don't be in a rush to get where you're going. Give yourself extra time for diaper explosions, potty breaks, tantrums, etc.
- Feed your toddler baby food. My 2-year-old loves eating these (on the road or at home) and she has no idea that it's baby food. It's basically an organic all-fruit smoothie. If you buy them with Amazon.com's Subscribe & Save program, the cost works out to be $1.24 per pouch. If you don't want to buy in bulk, I've seen these at Babies 'R Us and a few grocery stores. Toddlers also love those "puffs." Just think about the least messy foods possible that don't need refrigeration or forks.
- Two words: Pacifier Clip!
- Don't forget to whip out your Busy Bag.
At the airport
- Take help when it's offered! Repeat after me: "Yes, thank you so much, I would love it if you could ____."
- Read up about Airport Security checks.
- Let your kids walk as much as possible while you're at the airport before boarding and on layovers. Let them get their energy out and reserve the stroller for those gotta-get-there-now times.
- Some airports have family restrooms that are big enough for strollers. Some even have nursing rooms with rocking chairs.
- If you're a military family, take advantage of the USO Lounges in many airports. These can be such a blessing--they have rocking chairs, TVs with cartoons, toys, books, even beds and cribs if you have a long layover.
- Some airports have children's activity and play areas. A few are sponsored by local children's museums.
- If you are going to be waiting near the gate for awhile, find a seat next to other kids. They might enjoy entertaining each other while you wait!
- When you get to your gate, you will need to go to the counter and request tags for your stroller and/or carseat if they will be gate-checked.
- If you didn't book a seat for your child under age 2, bring your carseat to the gate anyway. You'll be glad you have it if you end up getting an empty seat next to you! (The carseat will have to be put in the window seat so it doesn't block other passengers in case of an emergency.)
- If you didn't book a seat for your child under 2, ask nicely at the gate if there is an empty seat next to you or if they can switch passengers around so that there will be one.
- When/if you check your stroller, take off anything that comes off easily, like the cupholder. If you don't, it probably won't be there when you get your stroller back.
- Preboarding for families with small children: Not all airlines do it anymore! Some offer "pre"boarding after the First Class customers board.
- If you're on an airplane that does not have pre-assigned seats (such as Southwest), board as early as possible. Passengers that board after you are likely to avoid you like the plague when choosing their seats, so you might end up with the whole row to yourselves. (Thanks, Mary Joy!)
- If you have pre-assigned seats, consider waiting to board the plane until the last group has boarded. If you don't have a ton of stuff to stow and/or you have an extra set of hands to help you, it might be better to spend less time waiting on a crowded and claustrophobic plane before takeoff.
On the flight
 |
| In Flight Photograph by photoblurts |
- If you're flying alone with your kid(s), pray for a Gramma to sit next to you. My dad gave me this tip and it's so true: grandparents who miss their grandkids will do anything to help out!
- Have a mantra like this: "No matter how bad it gets, this will all be over in 6 hours." Repeat mantra frequently. (Thanks, Kristi!)
- Take-offs and landings can be hard on those sensitive baby/toddler ears, so get them to suck while you're changing altitude. They can use a pacifier, drink from a bottle or sippy cup, or nurse. Chewing gum for older kids works well, too.
- A lot of airplanes have changing tables in the restrooms. Sometimes only 1 restroom will have the table, though, so check before you lock yourselves in that tiny room!
- Ignore any dirty looks you might get from fellow travelers. If they've never been in your shoes before, chances are they will be one day.
- Unless you are pressed for time, let all other passengers off the plane before you. Then you won't be stressed while gathering all your belongings and herding your children off the plane.
- Most importantly: Hope that someone else's baby is fussier than yours. =)
- If you have to go through customs after you arrive, there may be a quick line for travelers with kids. Ask if you don't see one. (This saved us almost 2 hours of waiting in line with an anxious/exhausted toddler!)
On the road trip
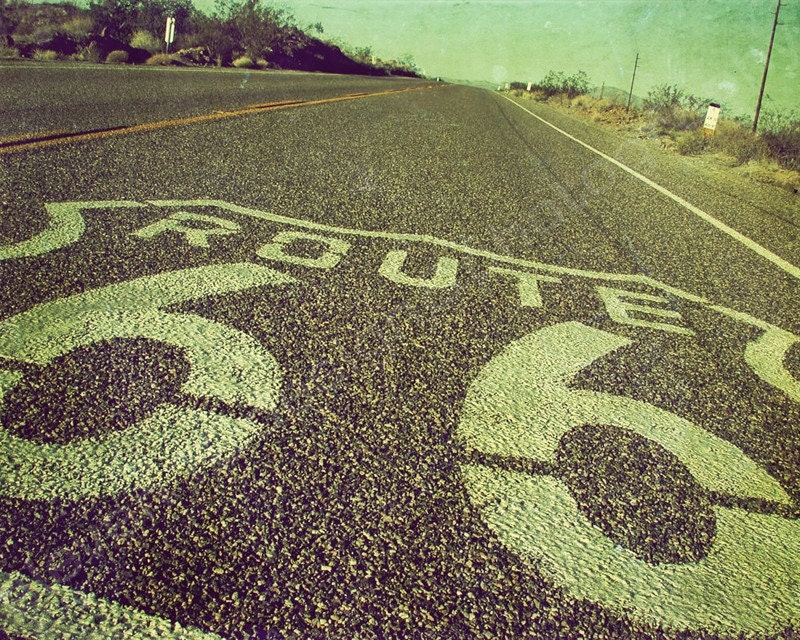 |
| America's Mother Road by eleven12design |
- Check out this post full of creative ideas for food and games to-go!
- Plan accordingly. Make sure your Busy Bag is accessible and anything that is packed away in the trunk will not be needed until you get to your destination.
- When you stop to eat, let the kiddos play at a park or playplace while you eat. Then, get their food to-go and let them eat it in the car. Two birds with one stone: They can run out their energy while you fuel up, and they'll have something to keep them occupied (lunch!) for at least a few minutes of the drive.
- The best bathrooms are going to be Starbucks. They don't want changing tables but at least you don't have to worry about what your kids are going to step on.
- Again, don't be in a rush to get anywhere. Easier said than done, I know.
- Check out this great selection of Etsy products to will keep the kids busy during the long drive.
Thursday, June 16, 2011
A Star-Spangled (Paint Chip) Banner - Tutorial
To celebrate the 4th of July this year, I made my own Star-Spangled Banner:
If my mantle looks familiar, you've seen it before with the paint chip Easter egg garland, which was inspired by Modern Parents, Messy Kids.
I'm writing up my own tutorial on this one, since I used a sewing machine instead of doing it by hand. I realized recently how much I dislike sewing by hand! If you've used a sewing machine, you should be able to do this project since it's just a basic straight stitch. If not, do it by hand and it will be just as cute!
Trace the star shape onto your paint chips and cut out as many as you want for your banner.
Then admire how patriotic all the stars look:
Okay back to work. It's time to sew now. I had more red and blue stars than white so I used a pattern of red-blue-red-blue-white, repeat.
There are a couple of ways you can sew these together as far as the spacing goes. I tried both and you'll see my results in a minute. The first way is to line them up right next to each other as you sew so they're close together and overlapping just a bit.
Or you can leave a small amount of space in between each star as you sew so they're more spread out. You don't want the gap to be too big because it will be more likely that they'll flip upside down when it's hanging.
I think I like the spread-out look better but the side that I made close together was definitely easier to hang. Can you see the difference?
While you're sewing, be careful how the already-sewn stars fall since you don't want a big jumbled mess when you're done. Then find somewhere to hang your Star-Spangled (Paint Chip) Banner!
So festive and easy to make. This is a quick 1-naptime craft for all you mommies out there!
Think about all the possibilities with this craft: You could make stars to hang above baby's crib as a mobile (double-sided so the backs are pretty too), decorate a birthday party table in your theme colors (sewn together as a banner or just as giant star-shaped "confetti")... so many options.
I'd love to see your version if you make one--leave a comment with your link if you blog about yours!
(Also check out this festive Korker Cake Garland I made for the 4th, my first guest post over at The CSI Project!)
If my mantle looks familiar, you've seen it before with the paint chip Easter egg garland, which was inspired by Modern Parents, Messy Kids.
I'm writing up my own tutorial on this one, since I used a sewing machine instead of doing it by hand. I realized recently how much I dislike sewing by hand! If you've used a sewing machine, you should be able to do this project since it's just a basic straight stitch. If not, do it by hand and it will be just as cute!
What you need to make a Star-Spangled (Paint Chip) Banner:
paint chips in red, white and blue
scissors
cardboard to cut out a star-shaped template
sewing machine (optional)
white thread
double-sided tape for hanging
double-sided tape for hanging
I used 21 paint chips total, 7 of each color. Don't worry if some of the red paint chips look pink--you will get the overall look of red, white and blue when it all comes together.
First you want to make yourself a star-shaped template out of your piece of cardboard. I traced one of Little Sweet's star shapes from a foam puzzle, then tweaked the size a bit to fit 2 stars on each paint chip. You could also draw your own or print out a star shape from Photoshop.
You want the white line to be close to the widest part of your star since you'll be sewing directly over that white line to give it some stability:
Trace the star shape onto your paint chips and cut out as many as you want for your banner.
Then admire how patriotic all the stars look:
Okay back to work. It's time to sew now. I had more red and blue stars than white so I used a pattern of red-blue-red-blue-white, repeat.
There are a couple of ways you can sew these together as far as the spacing goes. I tried both and you'll see my results in a minute. The first way is to line them up right next to each other as you sew so they're close together and overlapping just a bit.
Or you can leave a small amount of space in between each star as you sew so they're more spread out. You don't want the gap to be too big because it will be more likely that they'll flip upside down when it's hanging.
I think I like the spread-out look better but the side that I made close together was definitely easier to hang. Can you see the difference?
While you're sewing, be careful how the already-sewn stars fall since you don't want a big jumbled mess when you're done. Then find somewhere to hang your Star-Spangled (Paint Chip) Banner!
So festive and easy to make. This is a quick 1-naptime craft for all you mommies out there!
Think about all the possibilities with this craft: You could make stars to hang above baby's crib as a mobile (double-sided so the backs are pretty too), decorate a birthday party table in your theme colors (sewn together as a banner or just as giant star-shaped "confetti")... so many options.
I'd love to see your version if you make one--leave a comment with your link if you blog about yours!

